Week 11 Coding Practice
Purpose
Practice Floats, forms, and styling of a form
Textbook Reference
- Chapter 15: Floating and Positioning (pages 387-398, 405-416)
Instructions
- Download the practice11.zip and save it into your practice folder for this course.
- Open the webpage, index.html in VS Code, and the browser
- Familiarize yourself with the HTML and CSS already present.
Center the <main> element
- Provide a width of
60%to the<main>element -
Center the
<main>element to the viewport (browser window)Centering a Block Element
Remember, to center a block element you need to target the margins on the left and the right side. Use the shortcut property of
margin: 0 auto;to set a zero margin on the top and bottom, and an automatically adjusting margin on the left and right.
Float Elements
- Create a style for the
<img>and give it a width of40% - Float the image to the left
- Give the image a right and bottom margin
-
Stop the float at the
<h2>element by using theclearproperty.Check that the float is applied correctly
The text, Customer Satisfaction Survey, should not float around the image for any viewport size.
Build the Form
- Begin your form under the comment
<!-- Start form here --> - Include an
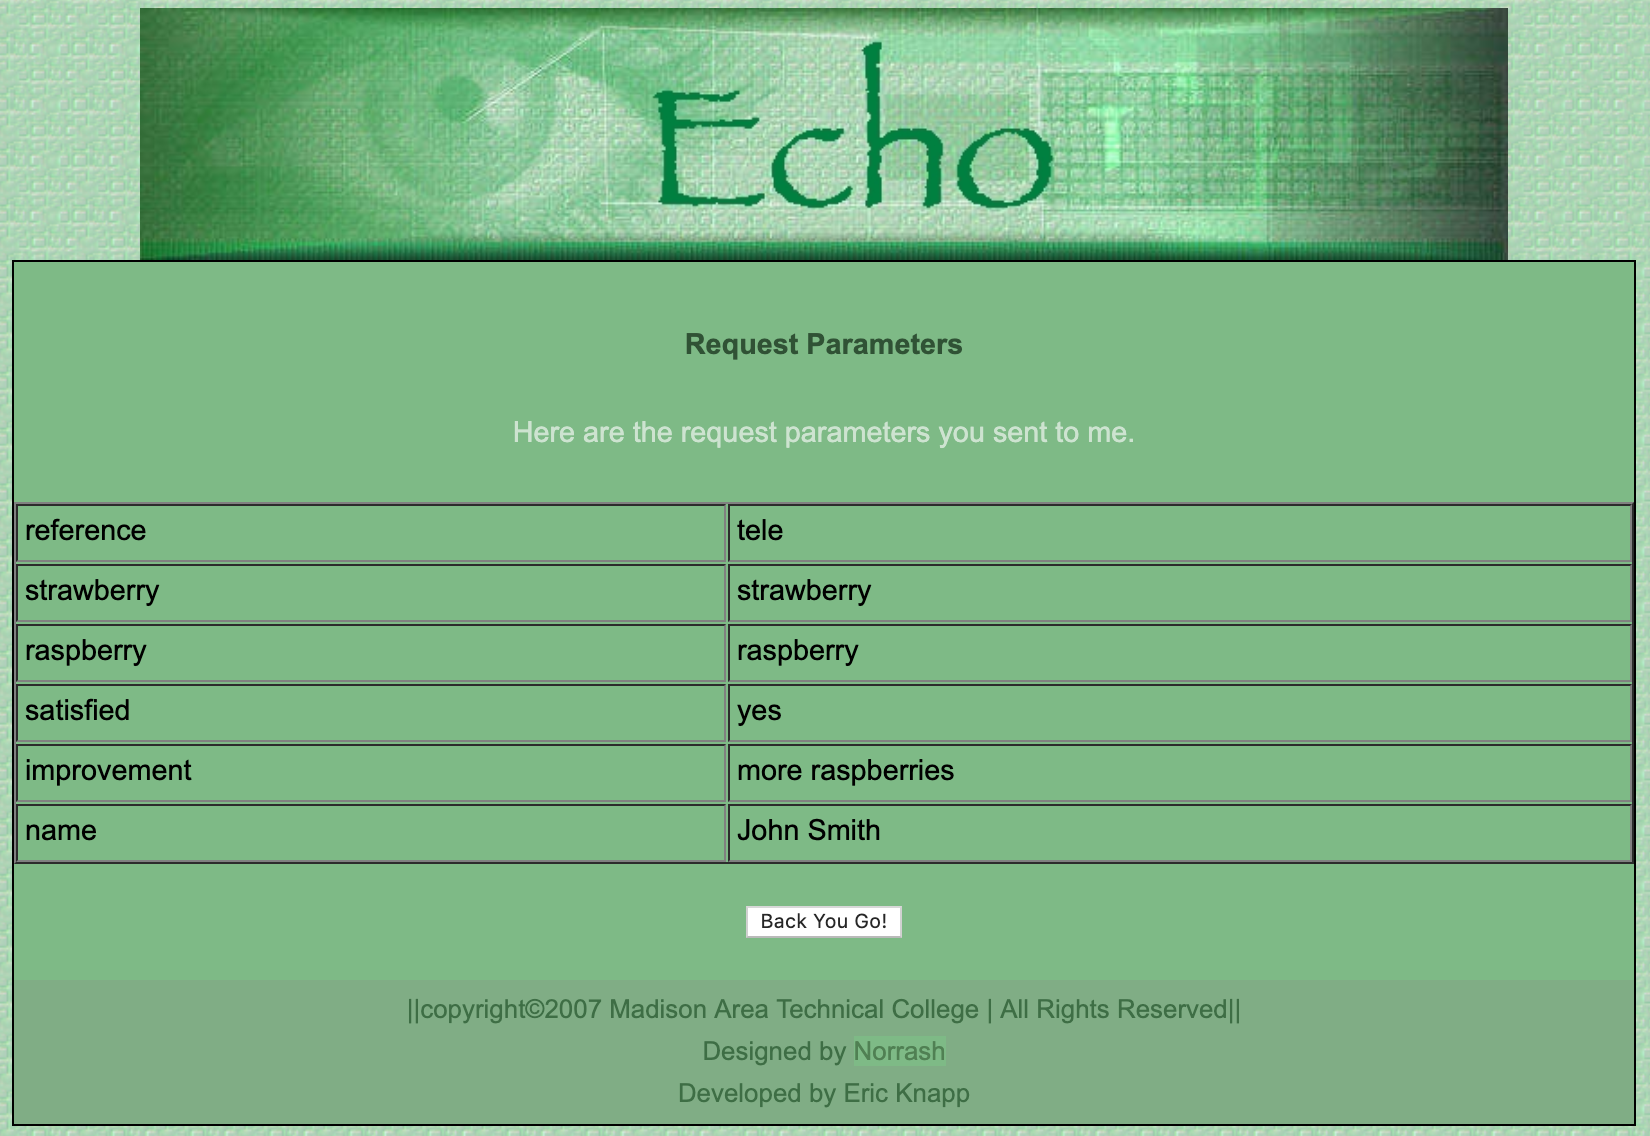
actionattribute with the server address:http://itins3.madisoncollege.edu/echo.php - Include the
methodattribute with the value ofpost
Use the information provided below to complete the rest of the form elements
Select Menu
- Create a label that reads: How did you hear about us?
- Create a select menu with the options: Radio, Television, Internet
- Connect the
<label>and the<select>with theforandidattributes- Remember, the name attribute belongs in the
<select>element, and value attributes containing the data sent to the server should be added to each<option>element.
- Remember, the name attribute belongs in the
Checkboxes
- Surround the checkboxes in a
<fieldset>element - Add a
<legend>element that reads: What type of tart did you order? - Checkboxes are for: Strawberry, Blueberry, Custard, Raspberry
- Create a
<label>for each checkbox. - Connect the
<label>and the<input>with theforandidattributes- Remember, checkboxes have different values in their
nameattribute and should have avalueattribute containing the data sent to the server.
- Remember, checkboxes have different values in their
Radio Buttons
- Surround the radio buttons in a
<fieldset> - Add a
<legend>that reads: Were you satisfied with your purchase? - Radio Buttons are for: Yes, No
- Make the "Yes" radio button selected on default
- Create a
<label>for each radio button - Connect the
<label>and the<input>with theforandidattributes- Remember, radio buttons have the same value in their
nameattribute and should have avalueattribute containing the data sent to the server.
- Remember, radio buttons have the same value in their
Textarea
- Create a label that reads: Do you have any improvement suggestions for us?
- Create a textarea input
- Connect the
<label>and the<textarea>with theforandidattributes- Remember to use the
<textarea>element and not an<input>element
- Remember to use the
Name Input
- Create a label that reads: Name
- Create a text input for the
Namelabel - Add a
placeholderthat reads, “Optional” - Connect the
<label>and the<input>with theforandidattributes
Submit
-
The button should read “Submit Survey” on the webpage. Use the
valueattribute- Remember that buttons do not need a name to pass to the server
Reset
-
The button should read “Clear” on the webpage. Use the
valueattribute.- Remember that buttons do not need a name to pass to the server
Test Your Work
-
Ensure that all form fields must make it to the server:
Style Your Form
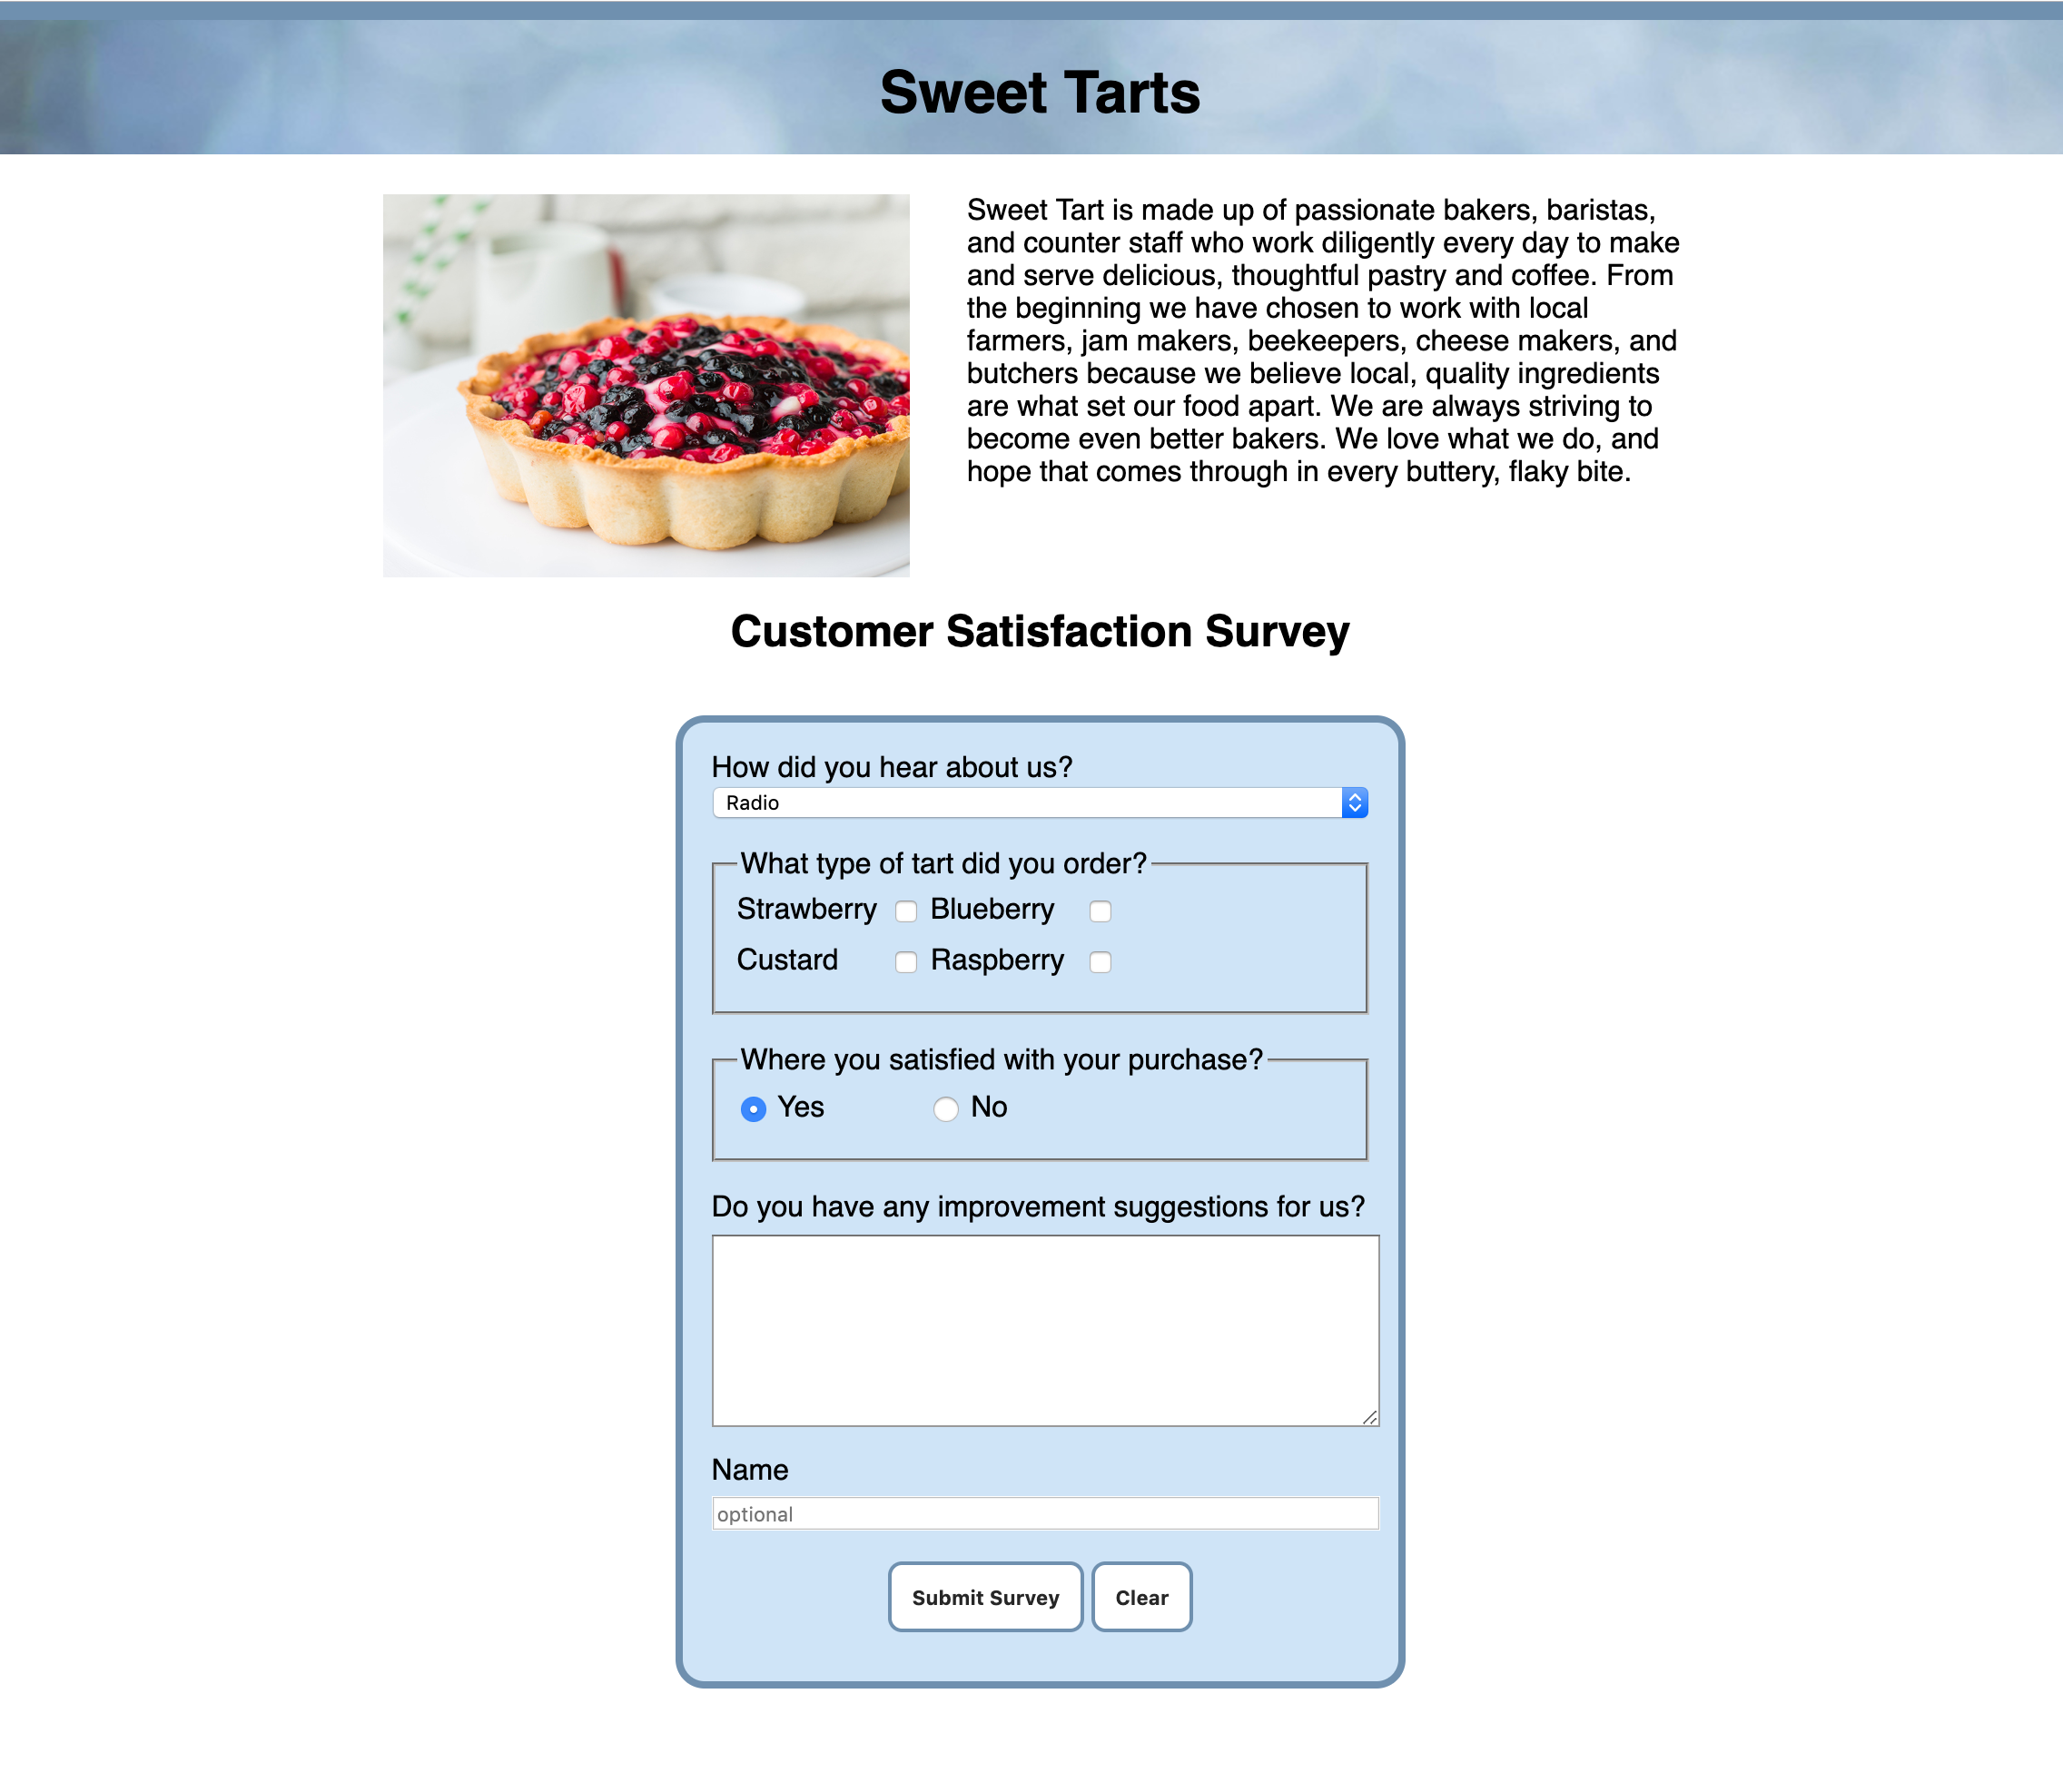
- Match the style shown in the Sample Output below.
- Colors and font choices can vary, but the layout, spacing, and positioning should be the same.
Sample Output
HTML Validation
- Go to https://validator.w3.org/
- Click on the Validate by File Upload
- Click on the Choose file button and navigate to the location of your HTML document.
- Click the Check button
- Print it as a PDF and save it into a folder named validations in your practice11 folder
- Name the PDF indexValidation.pdf.
CSS Validation
- Go to https://jigsaw.w3.org/css-validator/
- Click on the by File Upload option
- Click on the Choose file button and navigate to the location of your CSS document.
- Click the Check button
- Print and save as a PDF and save the validation in a folder called validations in your practice11 folder
- Name the PDF cssValidation.pdf
Grading Criteria
- The correct file directory structure exists in the
practice10folder along with the HTML and CSS validation. - All course coding standards have been followed.
- Correct centering of the
<main>element - Correct of the float property.
- All form fields are implemented to the practice instructions
- The CSS styling matching the sample output (color and font choices may vary).
- Placeholder text has been added to first name, last name, password, and instruction fields.
- Explicit labels have been added to every form field.
- Reflection questions are answered honestly and thoroughly.
Submission
Part 1: Reflection
- Locate the submission link for Practice 9 in Brightspace (Module 2 > Week 11 > Week 11 Coding Practice).
- Copy the below text (there is a copy icon in the upper-right of the textarea) and paste it into the Comments section.
- Answer the questions in the Brightspace.
1. How are you doing? Are you encountering any issues preventing you from completing this week's assignments? What can I do to better support you this week?


2. What did you find particularly insightful this week?


3. What part of the learning or coding process did you find most challenging? How did you overcome it?


4. What questions (if any) do you have about the material covered this week?


5. How does using a float change the normal flow of elements on a page? What effect does the clear property have on a float?
Part 2: Upload .zip
- Compress your entire practice11 folder to a .zip (zipped) file.
-
Do not zip the practice or Web Development folders. You should have the following files/folder in the zip file:
- images (folder)
- with images
- stylesheets (folder)
- index.css
- validations (folder)
- 1 HTML validation file
- 1 CSS validation file
- index.html
- images (folder)
-
Click on "Upload" to upload your .zip file or you can drag and drop it into the submission window.
- Click "Submit"