Week 7 Coding Practice
Purpose
Transform HTML through Cascading Style Sheets
Textbook Reference
- Chapter 12: Formatting Text
- Chapter 13: Colors and Backgrounds (pages 303-338)
Instructions
Directory Structure
- Download the practice07 and save it into your practice folder for this course.
- Open the webpage, index.html in VS Code, and the browser.
- Besides adding the link element to the HTML document, NO changes should be made to the HTML.
Add an External Stylesheet
The index.css stylesheet has been started already. Leave the styles for the <main> element in the stylesheet.
- Create a style that makes the
<h1>text a different color. - Create a style that makes the
<h2>text a different color. - Link the index.css stylesheet to the index.html.
- Make sure you can see your styles take effect on the webpage.
Format the Text
- The
<body>element should use a sans-serif font-family. - Center everything in the
<header>element - Using only one CSS rule, style the
<h1>,<h2>, and<h3>elements in a serif font-family. - Using only one CSS rule, apply some letter-spacing to the
<h1>,<h2>, and<h3>elements. - Increase the font-size of the navigation text.
- Remove the default underline from all links
- The links in the
<main>element should appear in bold. Use CSS, not an HTML element. Hint: use a descendent selector to target only the appropriate links. - Using only one CSS rule, increase the line-height of the paragraphs and list items.
- Change the bullet points in the unordered list to use a square.
- Center the footer text.
Add Color
The <h1> and <h2> should already have different colors applied to them.
- Change the color of the
<h3>elements. Use a hex value for this. - Change the background color of the
<main>element - make sure this is light enough that the text is still legible. Use a hex value for this. - Change the color of all the links to something different than the default blue.
Pseudo-class Selectors
- Change the color of the visited links. Use an RGB value.
- When links are hovered over by the mouse, they should change color and have a text-shadow. Use an RGB value.
Attribute Selector
- Using an attribute selector, change the background color of the
<section>elements that contain the text, "door" in theiridvalue, to white. Only one CSS rule is needed!
Background Image
-
Apply the cactusBackground.jpg as a background image to the
<body>element.- Keep the background color you applied earlier. Keeping a background-color style is needed if your image fails to load.
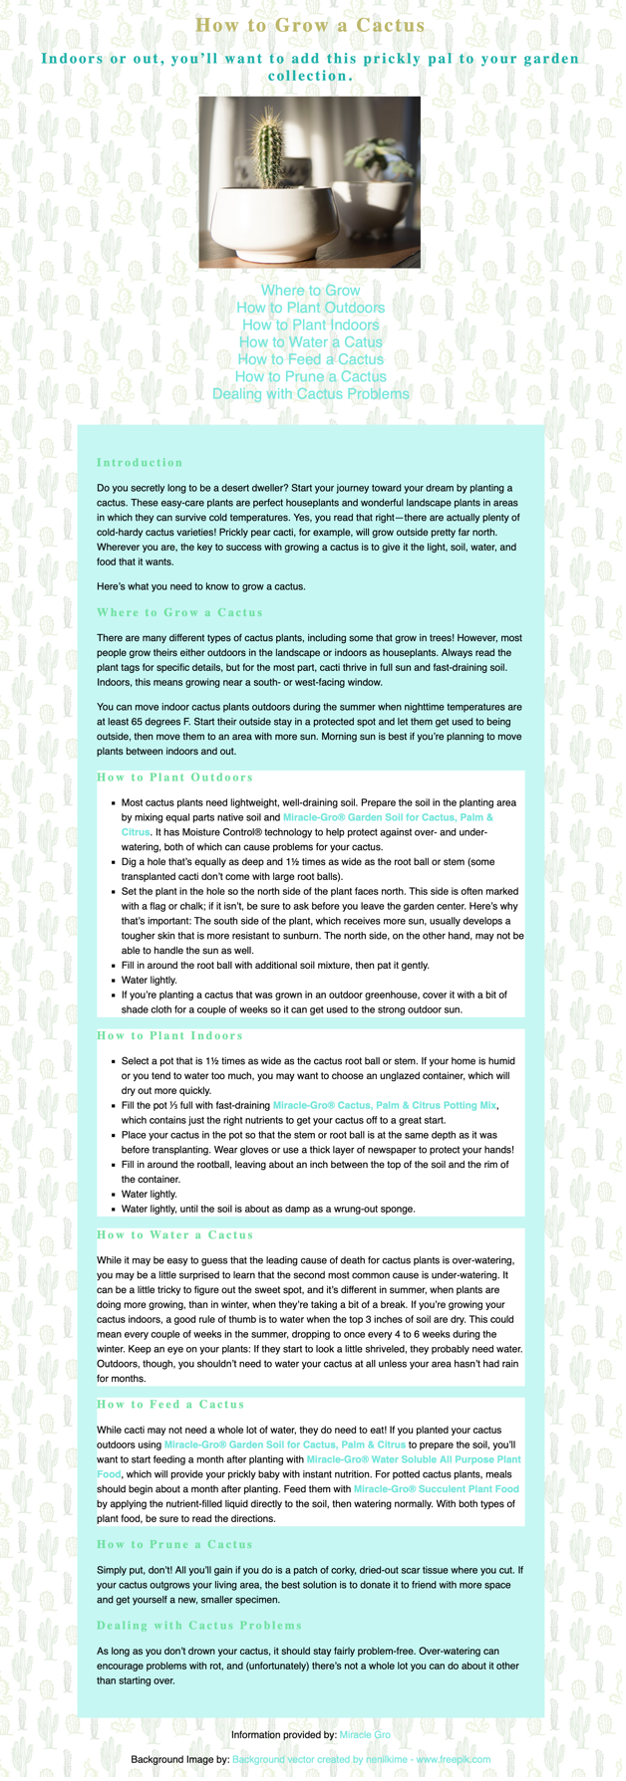
Sample Output
HTML Validation
- Go to https://validator.w3.org/
- Click on the Validate by File Upload
- Click on the Choose file button and navigate to the location of your HTML document.
- Click the Check button
- Print it as a PDF and save it into a folder named validations in your practice07 folder
- Name the PDF indexValidation.pdf.
CSS Validation
- Go to https://jigsaw.w3.org/css-validator/
- Click on the by File Upload option
- Click on the Choose file button and navigate to the location of your CSS document.
- Click the Check button
- Print and save as a PDF and save the validation in a folder called validations in your practice07 folder
- Name the PDF cssValidation.pdf
Grading Criteria
- The correct file directory structure exists in the
practice07folder along with the HTML and CSS validation. - All course coding standards have been followed.
- All text formatting follows practice instructions and is implemented correctly.
- All color follows practice instructions and is implemented correctly.
- All pseudo-class selectors follow practice instructions and is implemented correctly.
- The background images is implemented correctly.
- Reflection questions are answered honestly and thoroughly.
Submission
Part 1: Reflection
- Locate the submission link for Practice 7 in Brightspace (Unit 2 > Week 7 > Week 7 Coding Practice).
- Copy the below text (there is a copy icon in the upper-right of the textarea) and paste it into the Comments section.
- Answer the questions in the Brightspace.
1. How are you doing? Are you encountering any issues preventing you from completing this week's assignments? What can I do to better support you this week?


2. Describe one moment in this week’s coding practice that made you say “Oh!” or changed how you understood something. What clicked?


3. What challenges (if any) did you encounter in your learning this week? To help, try using this sentence format: This week, I struggled with ________. I think this challenge came up because ________. To work through it, I ________.


4. What questions (if any) do you have about the material covered this week?
Part 2: Upload .zip
- Compress your entire practice07 folder to a .zip (zipped) file.
-
Do not zip the practice or Web Development folders. You should have the following files/folder in the zip file:
- images (folder)
- with images
- stylesheets (folder)
- index.css
- validations (folder)
- 1 HTML validation file
- 1 CSS validation file
- index.html
- images (folder)
-
Click on "Upload" to upload your .zip file or you can drag and drop it into the submission window.
- Click "Submit"