Week 3 Coding Practice
Purpose
Turn a recipe into a webpage by practicing semantic mark up, and HTML lists.
Textbook Reference
Chapter 4: Marking up Text
Instructions
Directory Structure
- Download the practice03 and save it into your practice folder for this course.
- Unzip the file and delete the .zip file (this is no longer needed).
- Open the webpage, index.html in VS Code, and the browser.
Find a Recipe
- Find a recipe online (or use one of your own). You will be turning your recipe into a webpage!
HTML Code
Add Semantic Landmarks
- Add
<header>,<main>, and<footer>element inside your<body>element. Remember to indent correctly.
Add <header> Content
- Place an
<h1>element in your<header>and use the name of your recipe as the content. - End the
<header>with a horizontal rule
Add <main> Content
-
Add three heading elements to create headings for Description, Ingredients, and Directions.
- Be mindful of which you need to use each time.
- Don’t skip headings, this is a violation of accessibility.
- Ensure you have only one main heading (
<h1>) - When using subheadings (
<h2>-<h6>) make sure you’re accurately describing your content hierarchy. For example, Ingredients would not be a subheading for Description.
head, header, and heading elements
Pay attention to the difference between
<head>,<header>, and headings (<h1>-<h6>). They can be confusing at first, they sound so similar. -
Under the Description heading, provide a short paragraph describing the recipe.
-
List the Ingredients in an unordered list.
- Any fractions must be done using HTML Character Entities.
-
To find your fraction’s character entity, use Google to search for it. As an example, if you wanted to know the character entity for ¾, you would search “HTML Character Entity for 3/4”
-
For more about character escapes and character entities, review Chapter 5: Marking Up Text.
-
List the Directions in an ordered list.
Add <footer> Content
- Start the
<footer>with a horizontal rule - In a
<p>(paragraph), cite where the recipe is from. - The location of the recipe should be in emphasis
<em>
Bonus!
- Add an image to your webpage.
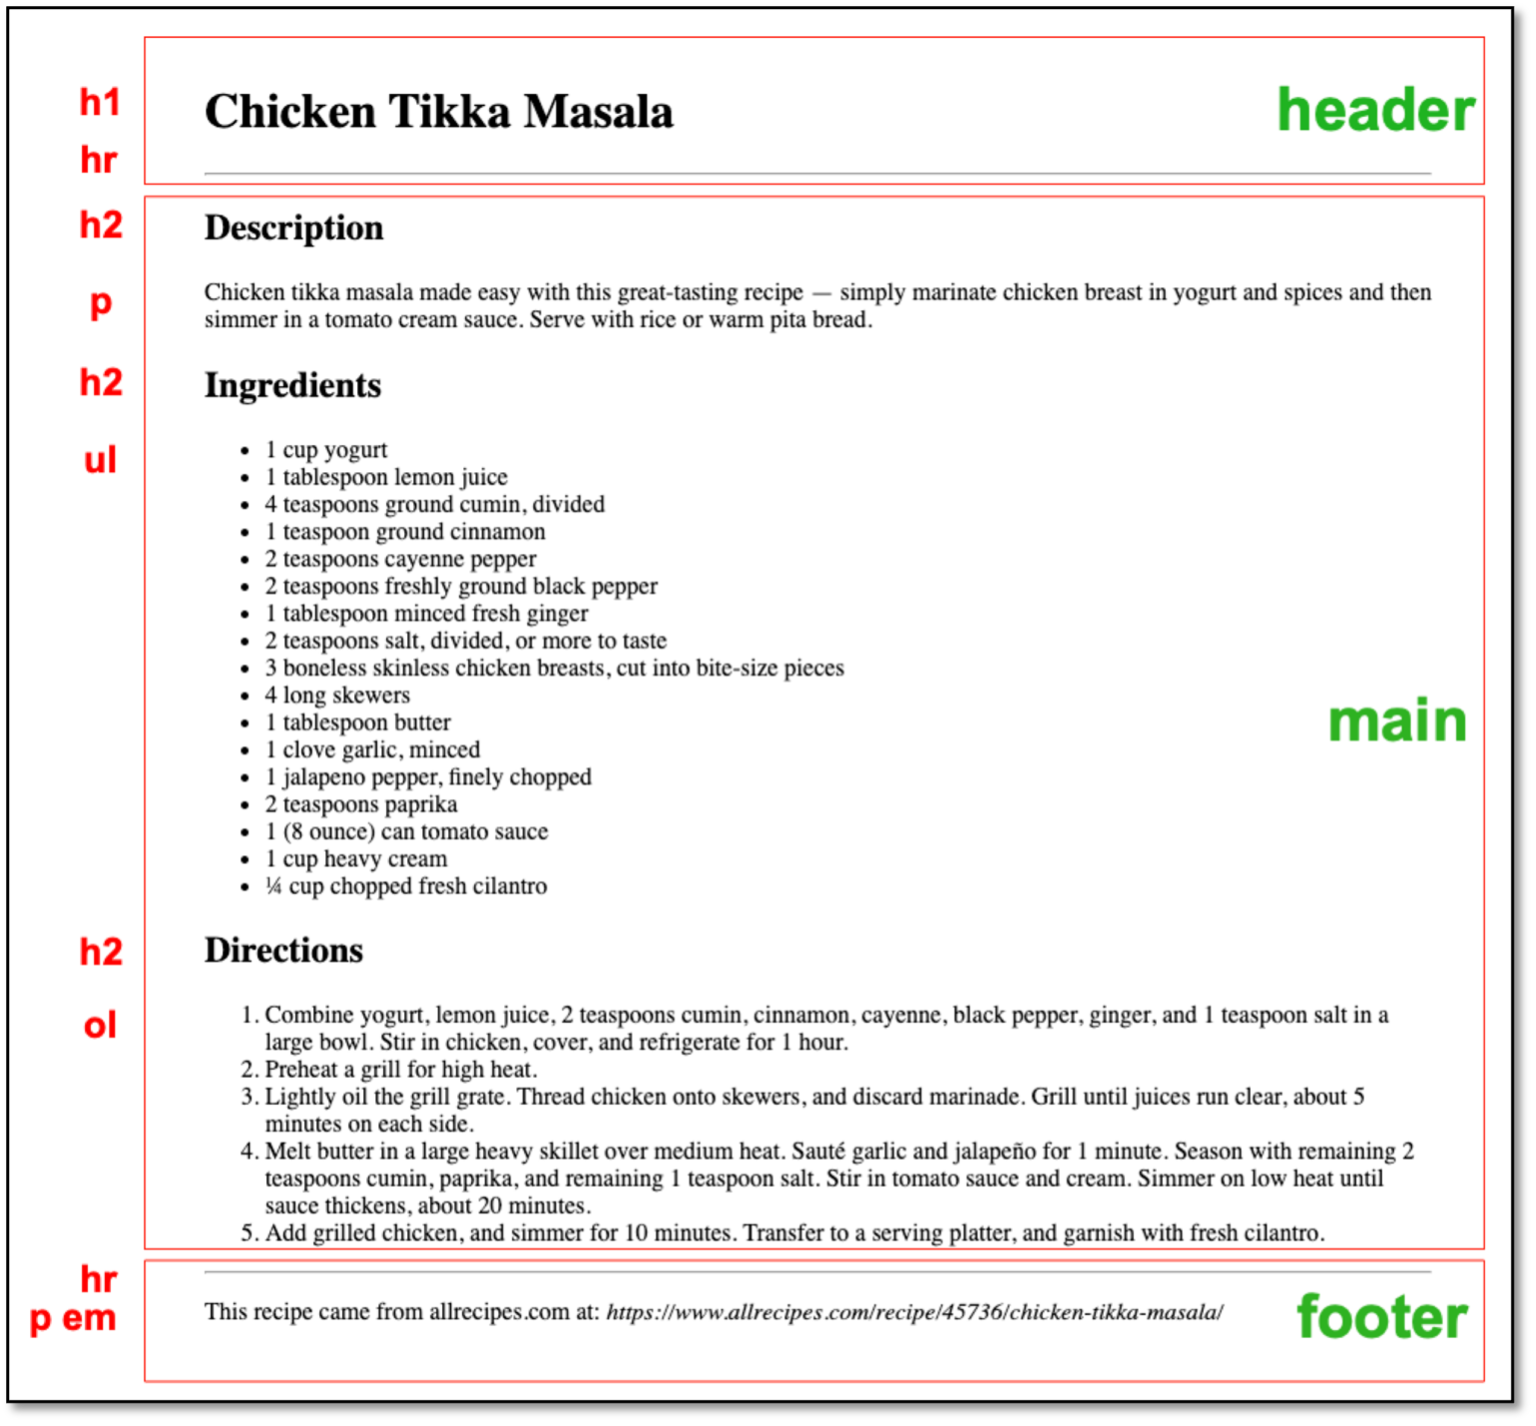
Sample Output
Do Not Use the Sample Below for Your Practice
You must use one of your own recipes or one you find on the internet for this practice. Do not use the Chicken Tikka Masala recipe.
Validation
- Go to https://validator.w3.org/
- Click on the Validate by File Upload
- Click on the Choose file button and navigate to the location of your HTML document.
- Click the Check button
- Print it as a PDF and save it into a folder named validations in your practice04 folder
- Name the PDF indexValidation.pdf.
Grading Criteria
- The correct file directory structure exists in the
practice04folder along with the HTML validation. - All course coding standards have been followed. Standards 1 - 15 apply.
- The correct HTML elements are used.
- HTML character entities have been used correctly where appropriate.
- Reflection questions are answered honestly and thoroughly.
Submission
Part 1: Reflection
- Locate the submission link for Practice 3 in Brightspace (Unit 1 > Week 3 > Week 3 Coding Practice).
- Copy the below text (there is a copy icon in the upper-right of the textarea) and paste it into the Comments section.
- Answer the questions in the Brightspace.
Weekly Reflections - Tip
You may find it helpful to copy and paste the questions below in word document, or other text editor, and writing your answers there before pasting them into Brightspace.
1. How are you doing? Are you encountering any issues preventing you from completing this week's assignments? What can I do to better support you this week?


2. Describe one moment in this week’s coding practice that made you say “Oh!” or changed how you understood something. What clicked?


3. What challenges (if any) did you encounter in your learning this week? To help, try using this sentence format: This week, I struggled with ________. I think this challenge came up because ________. To work through it, I ________.


4. What questions (if any) do you have about the material covered this week?
Part 2: Upload .zip
- Compress your entire practice03 folder to a .zip (zipped) file.
-
Do not zip the practice or Web Development folders. You should have the following files/folder in the zip file:
- images (folder)
- stylesheets (folder)
- validations (folder)
- 1 HTML validation file
- index.html
-
Click on "Upload" to upload your .zip file or you can drag and drop it into the submission window.
- Click "Submit"
