Practice - Forms
Purpose
Create and style a web form.
Textbook Reference
- Chapter 9: Forms
HTML: Build the Form
Set Up
- Save the practice-forms.zip in your practice folder for this course.
- Locate the comment
<!-- ADD THE REGISTRATION FORM HERE -->in the index.html file. - Add a
<form>element.- Use
method="post" - Use
action="http://itins3.madisoncollege.edu/echo.php"
- Use
Personal Information
- Create a
<fieldset>with the<legend>: Personal Information -
Add the following fields:
Field Type Label Special Requirements Text *First Name: Required Text *Last Name: Required Email *Email: Required Text *Phone: Required -
Requirements to follow:
- Add a line break (
<br>) after the first three<input>elements. - All labels must be explicit, using the
forandidattributes. - Validate that all data entered makes to the green Echo screen before moving on.
- Add a line break (
Experience Level
-
Create a
<fieldset>with the<legend>: Experience LevelField Type Label Special Requirements Radio Beginner Default selection (should be checked by default) Radio Intermediate --- Radio Advanced --- -
Requirements to follow:
- All labels must be explicit.
- Labels must appear after the radio button.
- Clicking on the label should select the radio button in addition to clicking the button.
- Only one radio button can be selected at a time
- Validate that all radio button when selected make to the green Echo screen before moving on.
Workshop Sessions
-
Create a
<fieldset>with the<legend>: Workshop SessionsField Type Label Checkbox Morning Flow Yoga Checkbox Breathwork & Meditation Checkbox Stress Relief Techniques Checkbox Sound Healing Checkbox Journaling & Reflection -
Add a line break (
<br>) after the first four<label>elements. - Requirements to follow:
- All labels must be explicit.
- Labels must appear after the checkbox button.
- Clicking on the label should select the checkbox in addition to clicking the box.
- All checkboxes should be able to checked at once.
- No arrays are allowed for storing values. Use the method of creating checkboxes like demonstrated in the course website.
- Validate that all checkboxes make to the green Echo screen before moving on.
Preferred Time
- Add an explicit
<label>named, Select your preferred time: -
Add a dropdown (
<select>) with:Field Type Label Option Morning Option Afternoon Option Evening -
Requirements to follow:
- No fieldset required since we are not grouping multiple fields together.
- Add a link break (
<br>) element after the last<option>element. - Validate that all selections make it to the green Echo screen before moving on.
Additional Notes
- Add a
<textarea>where users can enter extra information. -
Include an explicit label
-
Requirements to follow:
- No fieldset required since we are not grouping multiple fields together.
- Add a line break (
<br>) after the<label> - Validate that entered text in the
<textarea>make it to the green Echo screen before moving on.
Contact Preferences
-
Create a
<fieldset>with the<legend>: Contact PreferencesField Type Label Checkbox Email updates Checkbox Text Reminders -
Requirements to follow:
- All labels must be explicit.
- All checkboxes should be able to checked at once.
- No arrays are allowed for storing values. Use the method of creating checkboxes like demonstrated in the course website.
- Validate that both radio selections make it to the green Echo screen before moving on.
Submit & Reset Buttons
- At the end of the form, add a Submit and Reset button
- Change the Submit button to read, "Register"
- Change the Reset button to read, "Clear"
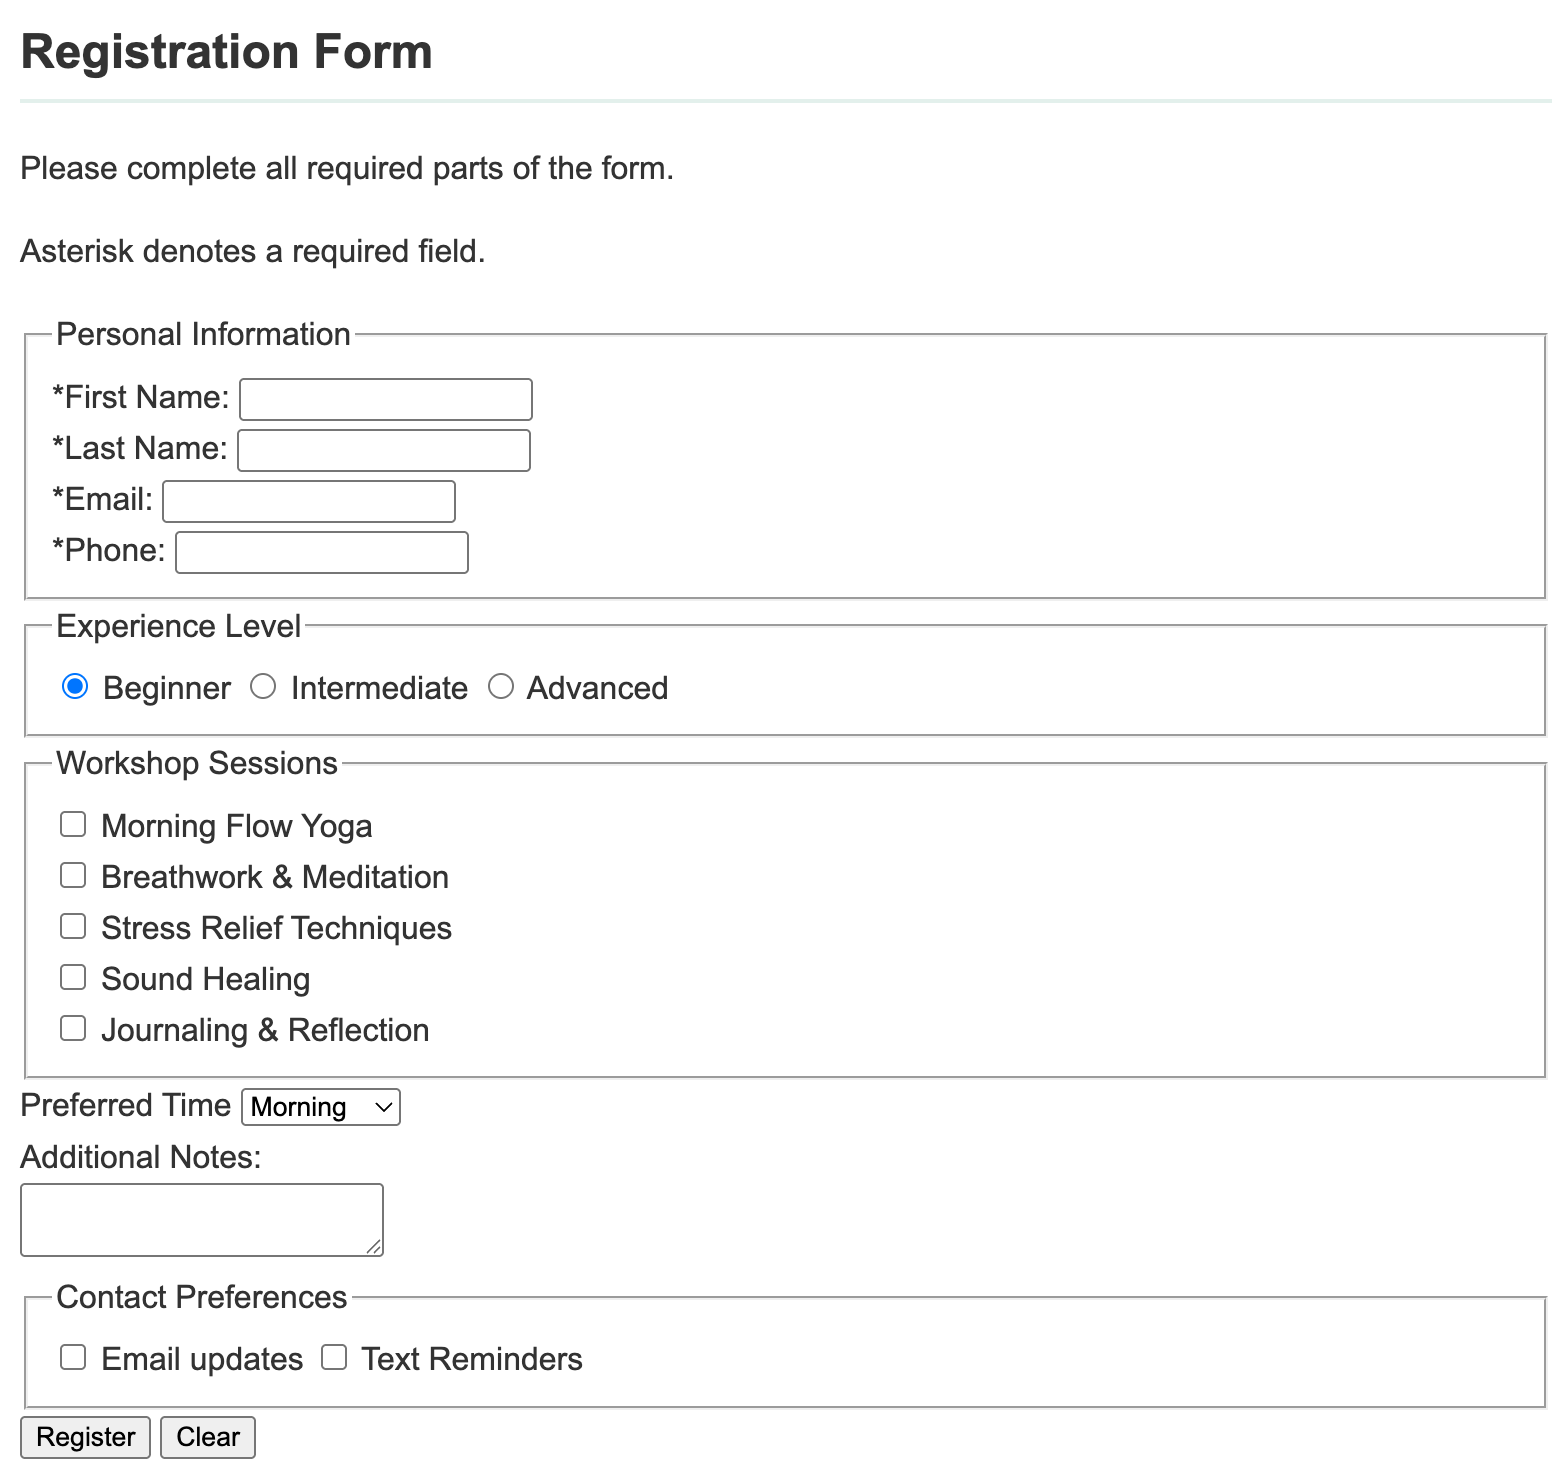
Sample Output
Example output without any styles added.
CSS: Add Form Styles
- Create a new stylesheet named, form.css and save it in your
stylesheetsdirectory. - Connect the new stylesheet to the index.html document. Make sure this stylesheet is listed after the index.html.
Test the CSS connection
Before you move on, make sure your stylesheet is properly connected to your HTML file.
-
Open your styles.css file and add a simple, visible style, such as:
body { background-color: yellow; } -
Save your file and refresh your webpage.
- If the background changes to yellow (or whatever color you chose), your stylesheet is linked correctly
- Once you’ve confirmed it’s working, remove the test style.
- If the background does not change, double-check your tag in your HTML and your file path to fix the connection before continuing.
 Tip: I recommend adding a comment heading for each style section to keep your CSS document clean and easy to read.
Fieldset & Legend
Fieldset Styles
- Add a 1.5rem bottom margin
- Add 1rem padding on all sides
- Add a 1px solid border in the hex color:
#c7ddd6or your choice. - Add a 5px border radius
- Add a background color of
#f9fbfaor your choice.
Legend Styles
- Make the font bold
- Add a right and left padding of .5rem
Inputs
Input, Select, and Textarea
- Using a group selector, style the
<input>,<select>, and<textarea>elements to have a 100% width. - Add .4rem padding to the top, left, and bottom. (use one style rule for this!)
- Add a top margin of .25rem and bottom margin of .75rem. (use one style rule for this!)
- Add a 1px solid border in the color of
#cccccc - Add a border radius of 4px
Checkboxes & Radio Buttons
Use the attribute selector to target just the checkboxes and radio buttons.
- Using a grouped attributed selector, make the width of the radio and checkbox elements auto
- Add a right margin of .4rem
Textarea
- Make the min-height 100px
Submit & Reset Buttons
Use the attribute selector to target just the submit or reset buttons.
- Add a top margin or 1rem.
- Add a .6rem padding on all sides.
- Make the background color
#7fb3a8(or a color of your choice). - Make the text white
- No border (remove it)
- On HOVER, the buttons should change their background color to
#5f978c(or a color of your choice.)
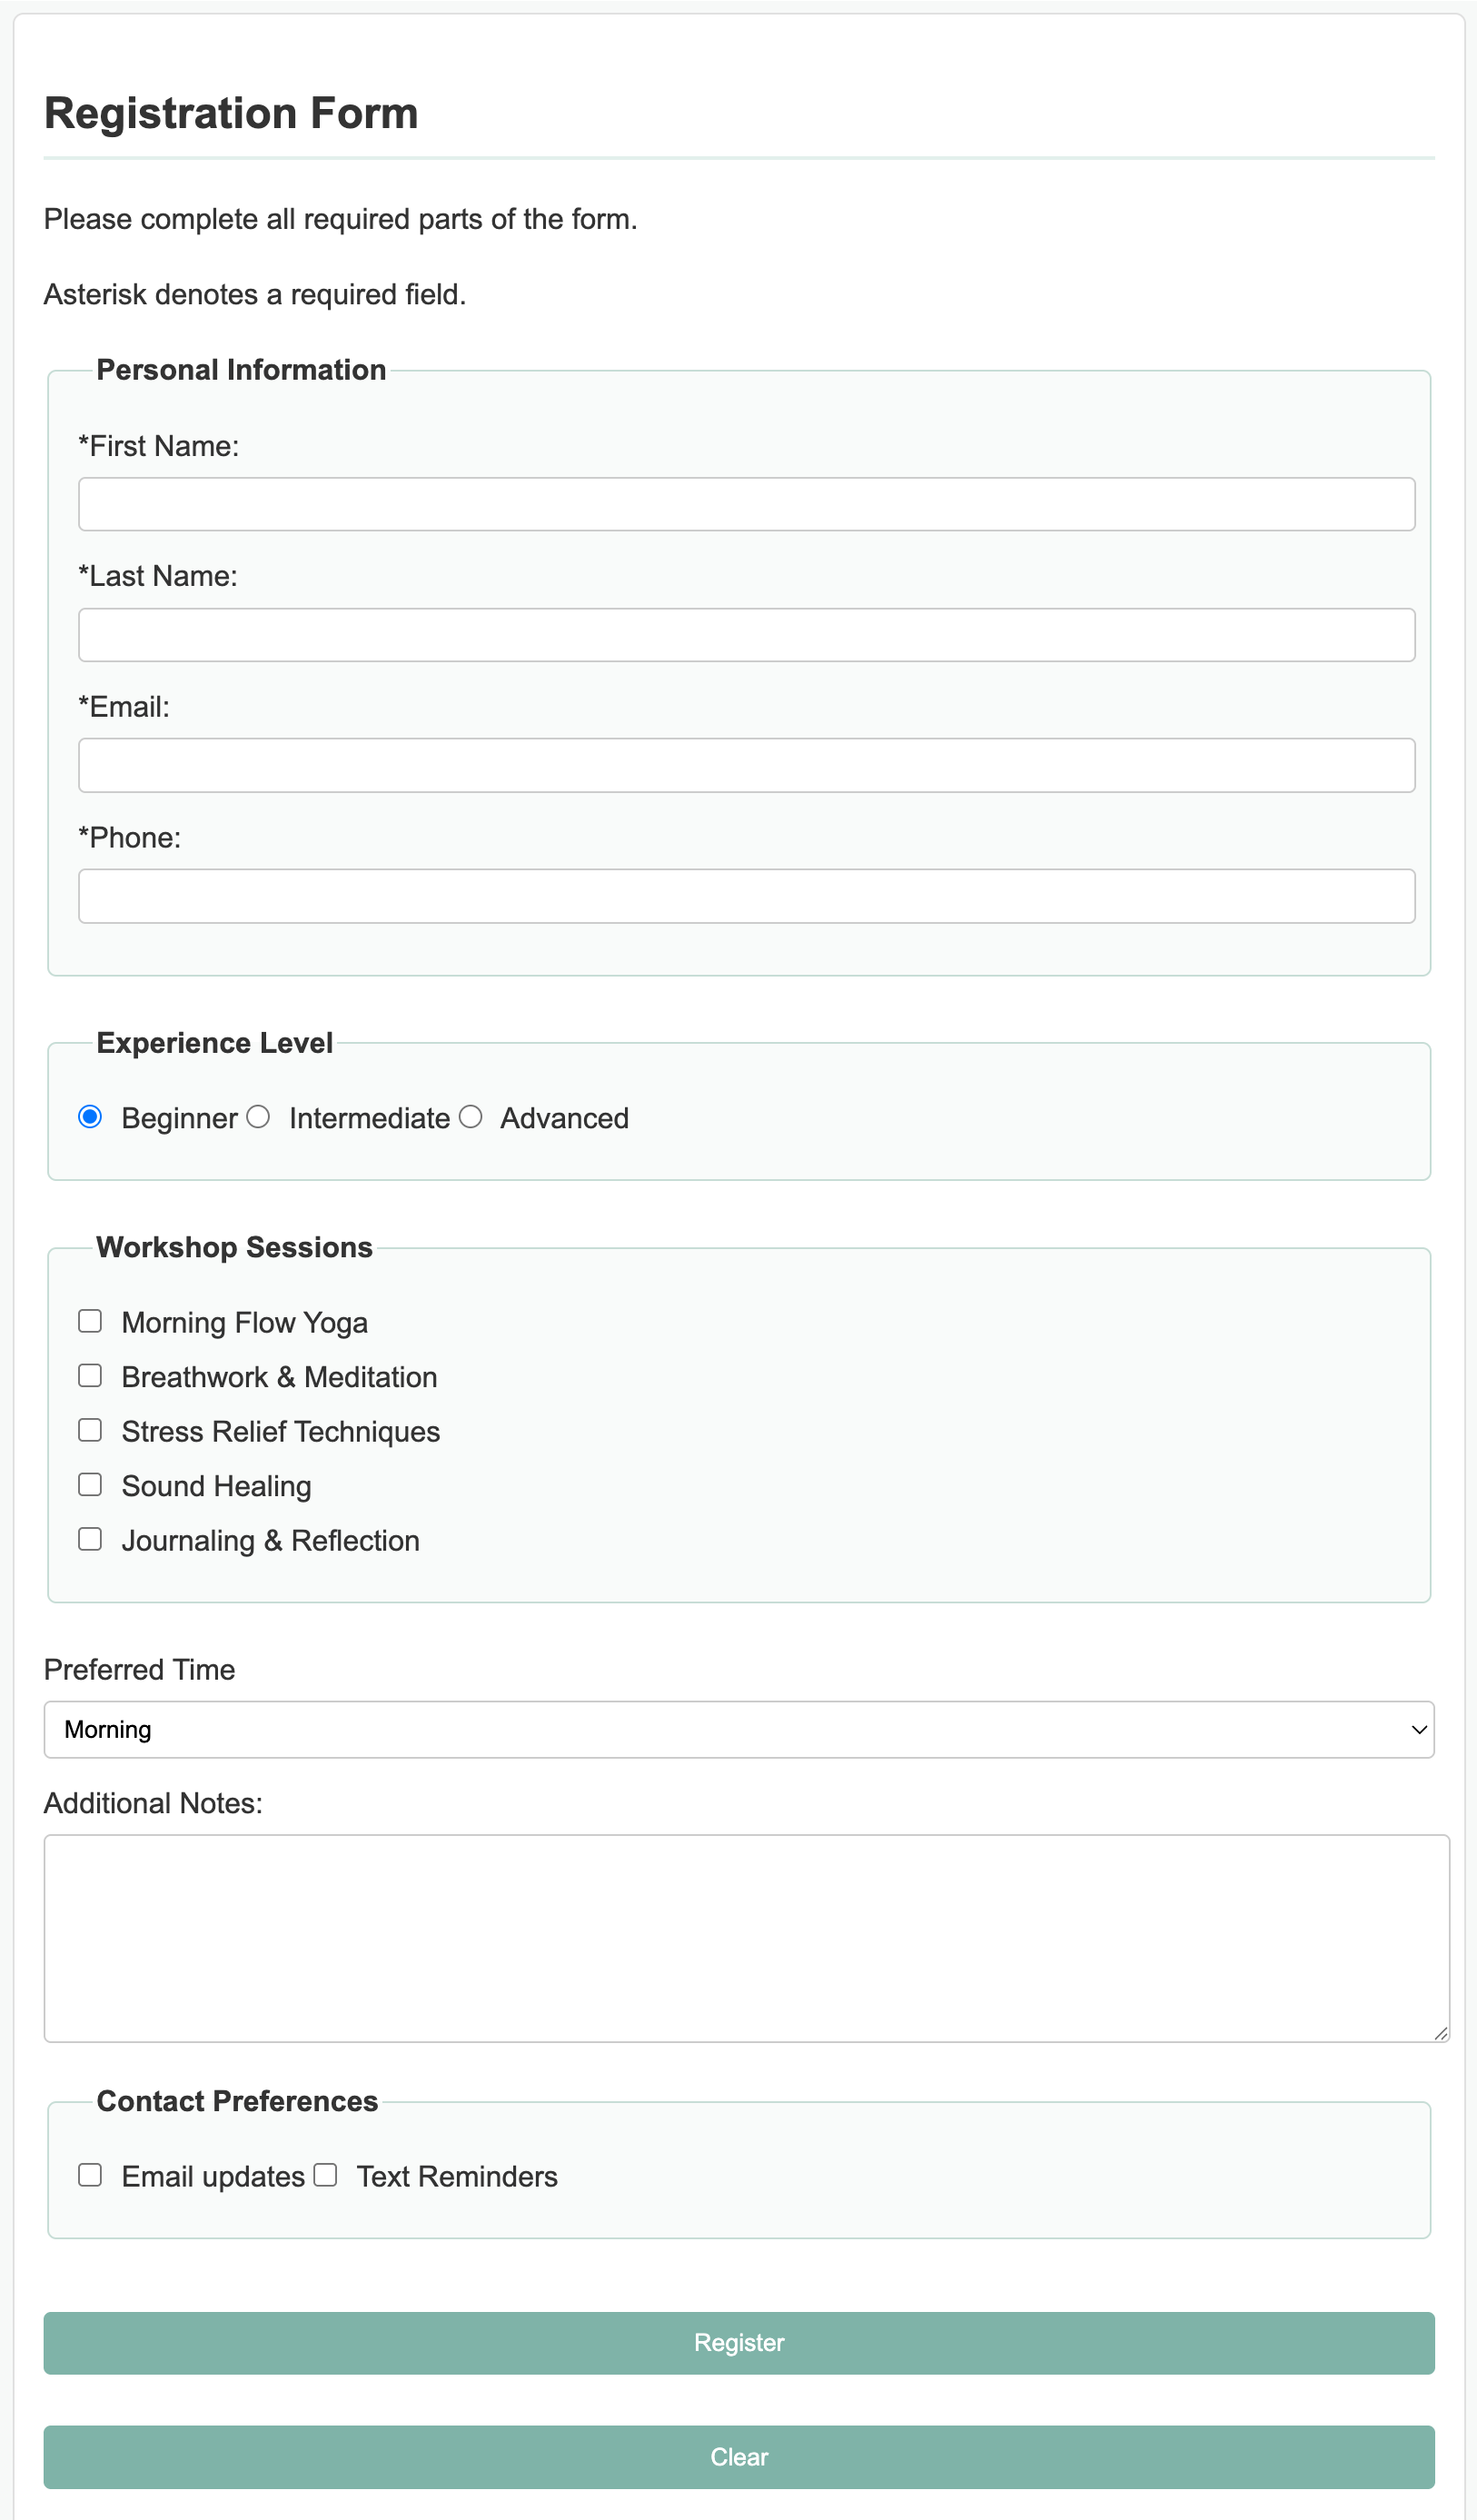
Sample Output
Example output with styles added.
HTML Validation
- Go to https://validator.w3.org/
- Click on the Validate by File Upload
- Click on the Choose file button and navigate to the location of your HTML document.
- Click the Check button
- Print it as a PDF and save it into a folder named validations in your practice10 folder
- Name the PDF formValidation.pdf.
CSS Validation
- Go to https://jigsaw.w3.org/css-validator/
- Click on the by File Upload option
- Click on the Choose file button and navigate to the location of your CSS document.
- Click the Check button
- Print and save as a PDF and save the validation in a folder called validations in your practice10 folder
- Name the PDF formCssValidation.pdf
Grading Criteria
- The correct file directory structure exists in the
practice-formsfolder along with the HTML and CSS validation. - All course coding standards have been followed.
- All inputs have EXPLICIT labels
- Each
<fieldset>has a<legend> - Only one Radio button can be selected at one time
- All Checkboxes in a
<fieldset>can be selected at once. - All form data entered and selected make it to the ECHO php program on the server and display on the green display page.
- HTML is properly indented and readable
- CSS improves readability but stays simple
Submission
Part 1: Reflection
- Locate the submission link in Brightspace: Unit 3 > Practice > Practice - Forms.
- Copy the below text (there is a copy icon in the upper-right of the textarea) and paste it into the Comments section.
- Answer the questions in the Brightspace.
1. How are you doing? Are you encountering any issues preventing you from completing this week's assignments? What can I do to better support you this week?


2. Describe one moment in this week’s coding practice that made you say “Oh!” or changed how you understood something. What clicked?


3. What challenges (if any) did you encounter in your learning this week? To help, try using this sentence format: This week, I struggled with ________. I think this challenge came up because ________. To work through it, I ________.


4. What questions (if any) do you have about the material covered this week?

5. What coding concept are you most confident about right now—and why?
Part 2: Upload .zip
- Compress your entire practice10 folder to a .zip (zipped) file.
-
Do not zip the practice or Web Development folders. You should have the following files/folder in the zip file:
- images (folder)
- stylesheets (folder)
- form.css
- index.css
- validations (folder)
- 1 HTML validation file
- 1 CSS validation file
- index.html
-
Click on "Upload" to upload your .zip file or you can drag and drop it into the submission window.
- Click "Submit"