Lab 1 - Set up
Objective
Set up the development environment, configure Git and GitHub, and initialize a project.
Part 1
Your first GitHub repository!
Before continuing, you will need your GitHub userid and password or authentication code, depending on how you set up your account.
Don't worry if you haven't used Git and GitHub before, we'll be learning much more about these in future lessons. For now, we are going to use a special part of GitHub's website, GitHub Classroom, to do some of the heavy lifting required to create a repository to hold your work for the semester.
Finally, don't worry if some of the images below look slightly different from what you see on your screen.
Ready?
-
To get started, you must have completed the following from the Getting Started portion of the course in Brightspace.
- Signed in to our Slack site.
- Sent me your GitHub id (username)
- Completed the Welcome Questionnaire in Brightspace.
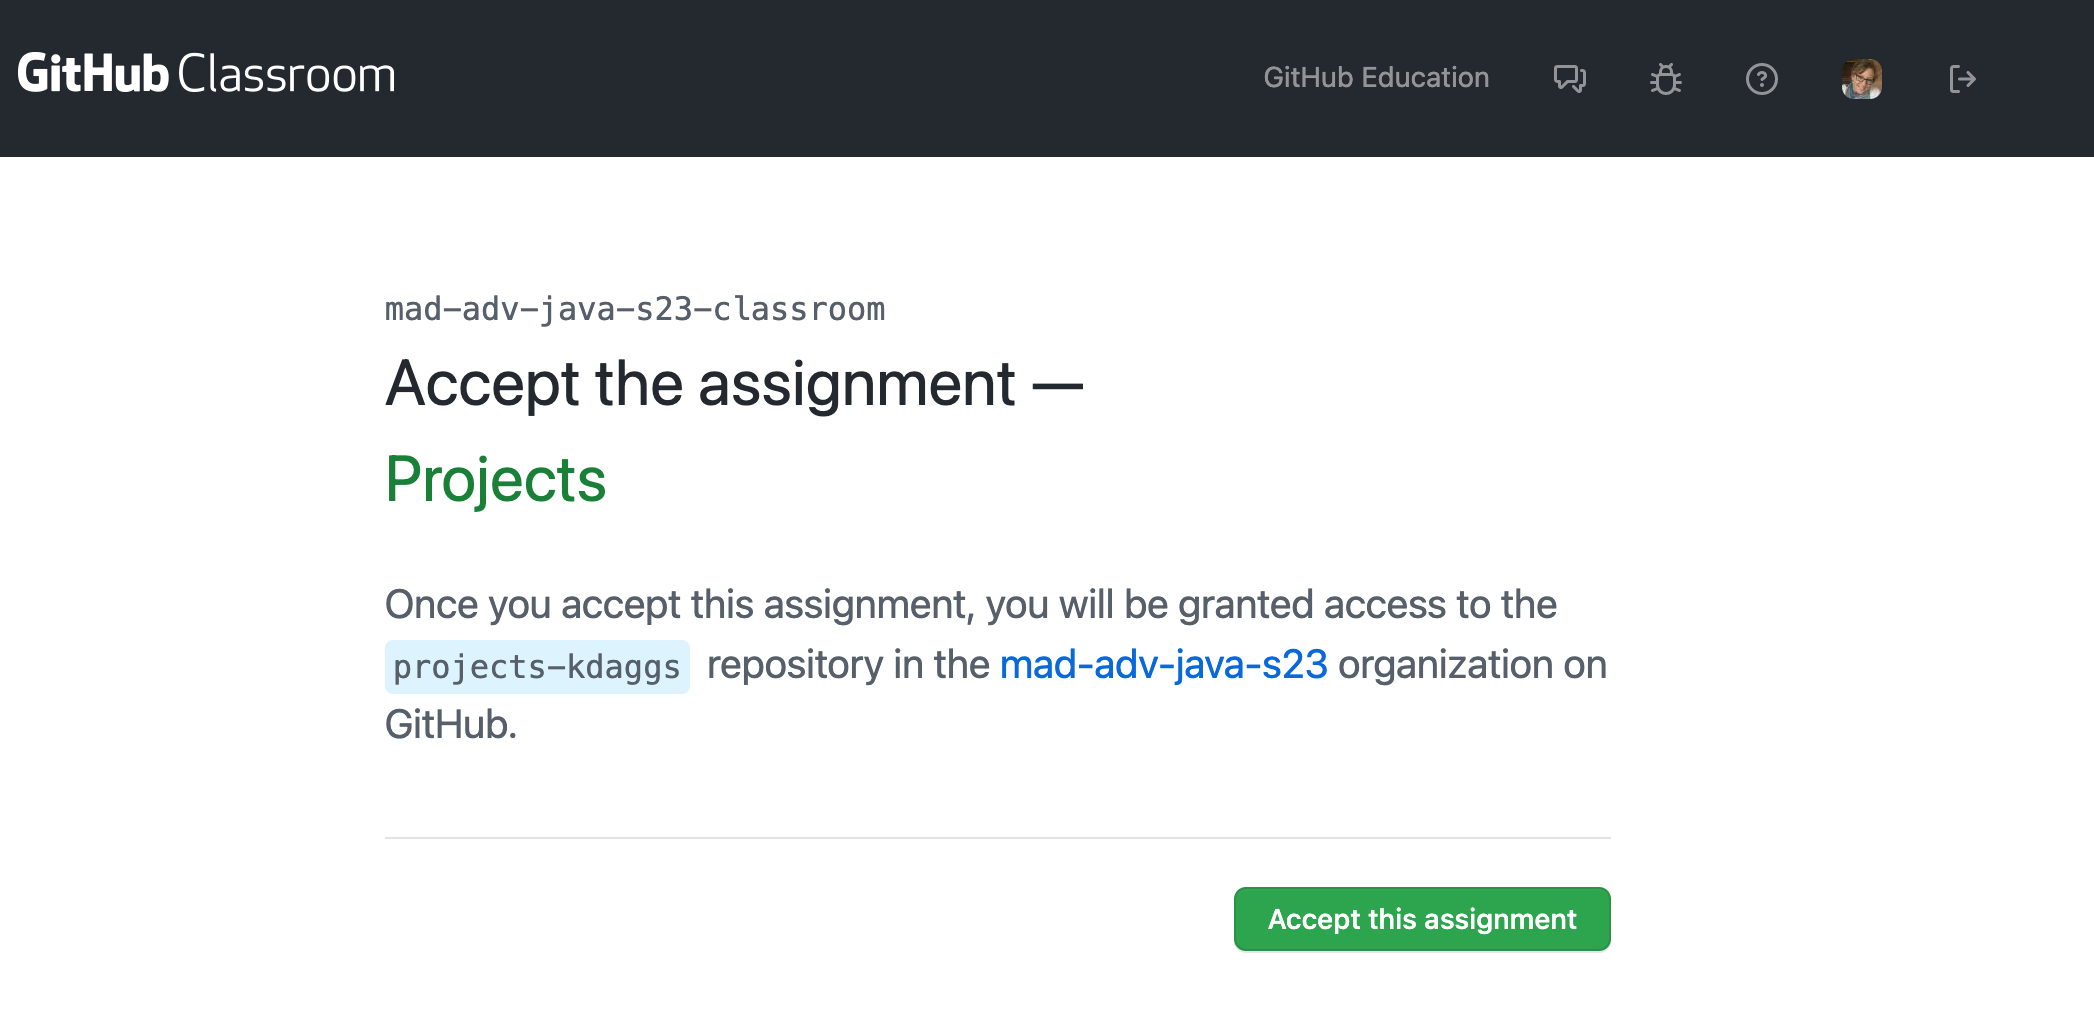
One these are completed, the instructor will send you the GitHub Assignment Link. When you open this link, you should see a page something like this.
-
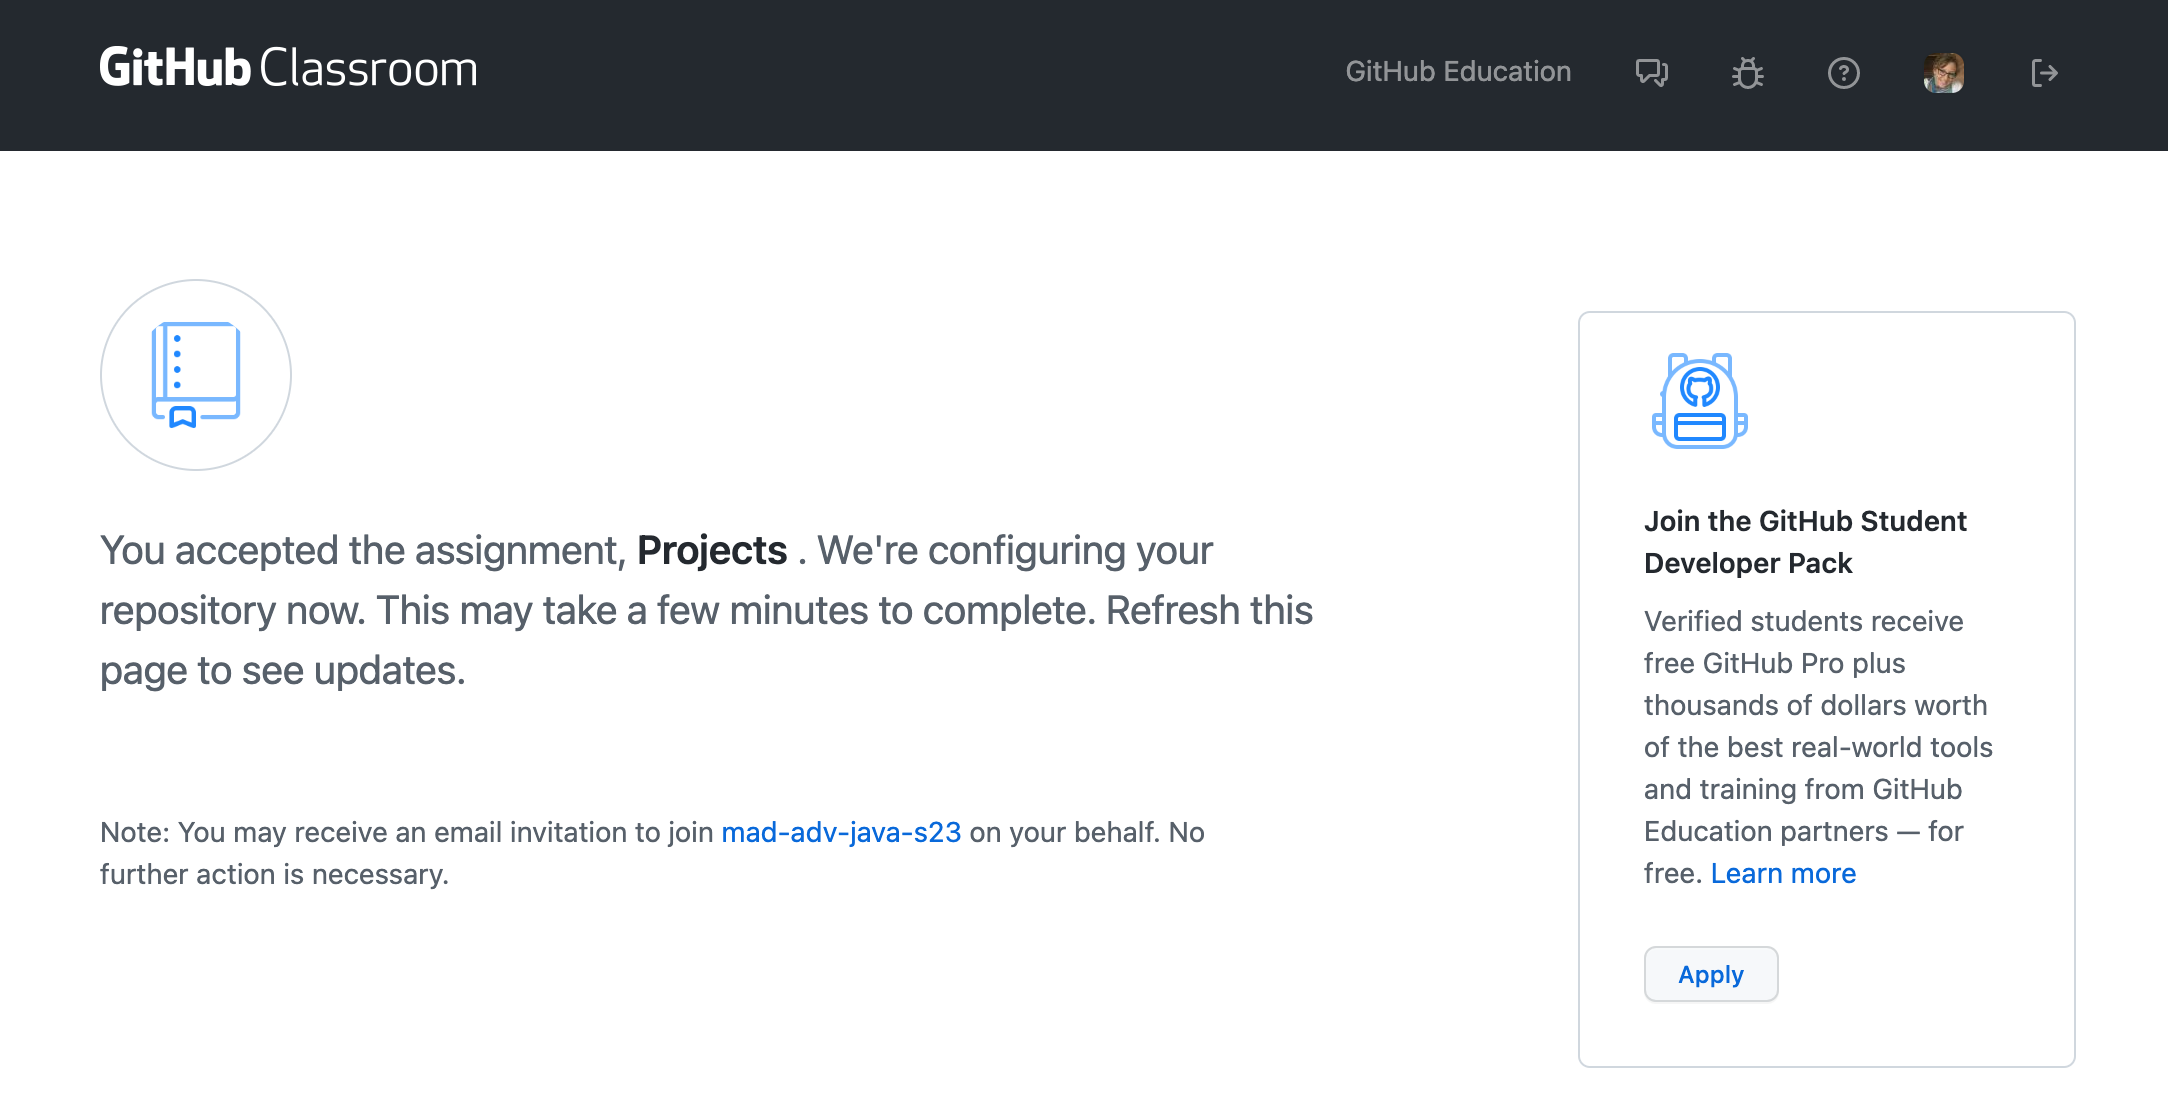
Click "Accept this assignment", which should take you to a page similar to the one below.
-
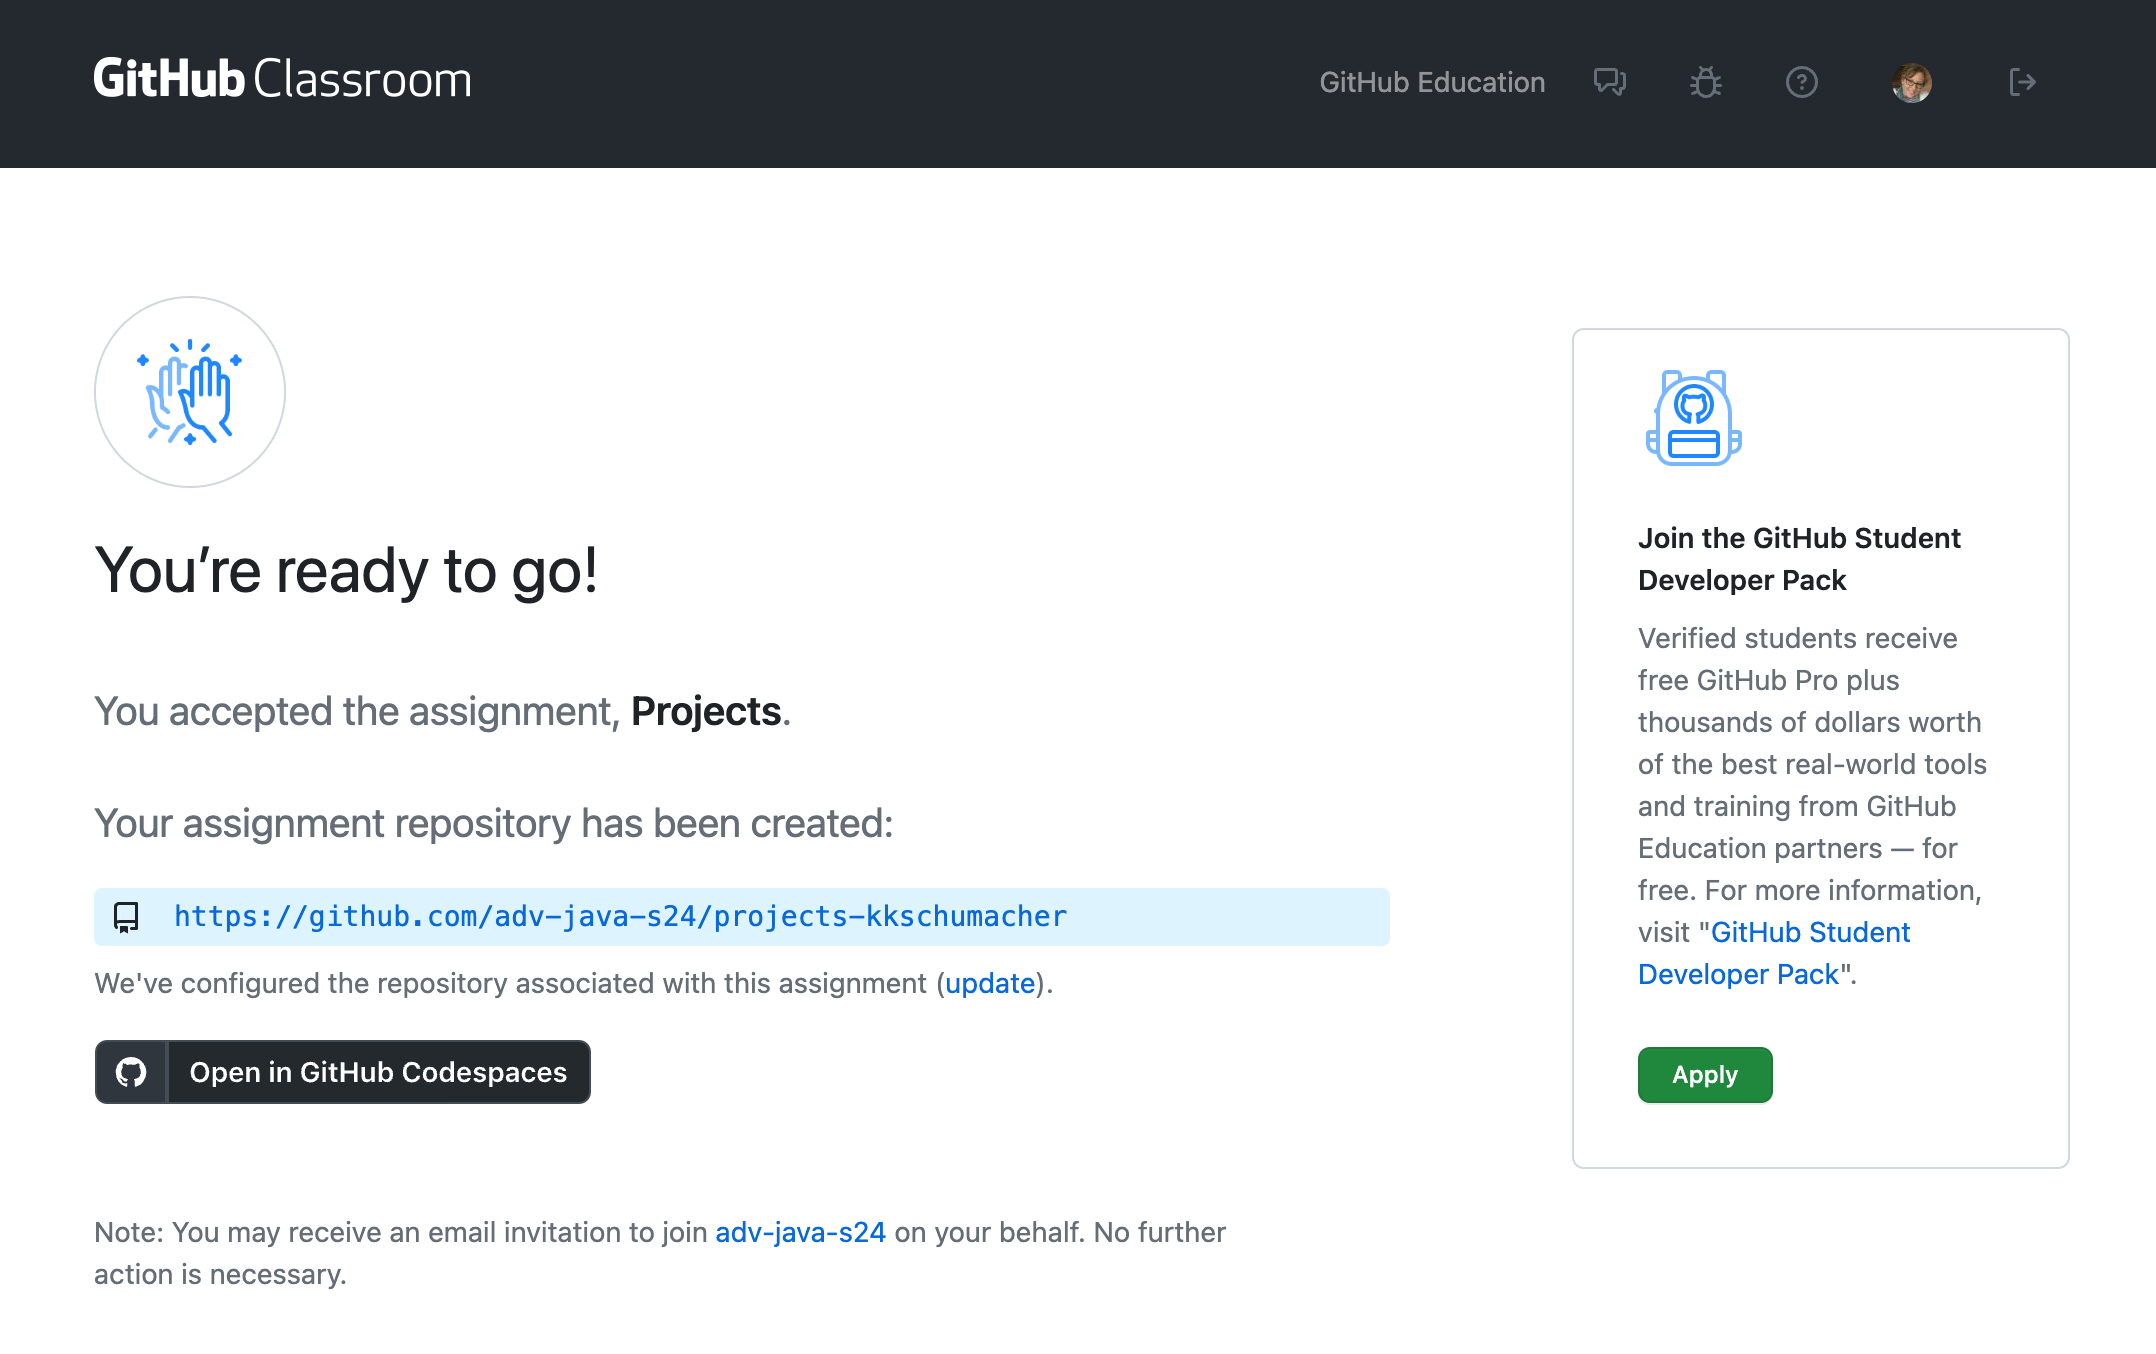
Wait a minute or two and then refresh the page. You will see a similar screen to the one below when the process is finished. You should also receive an email when the process is complete.
-
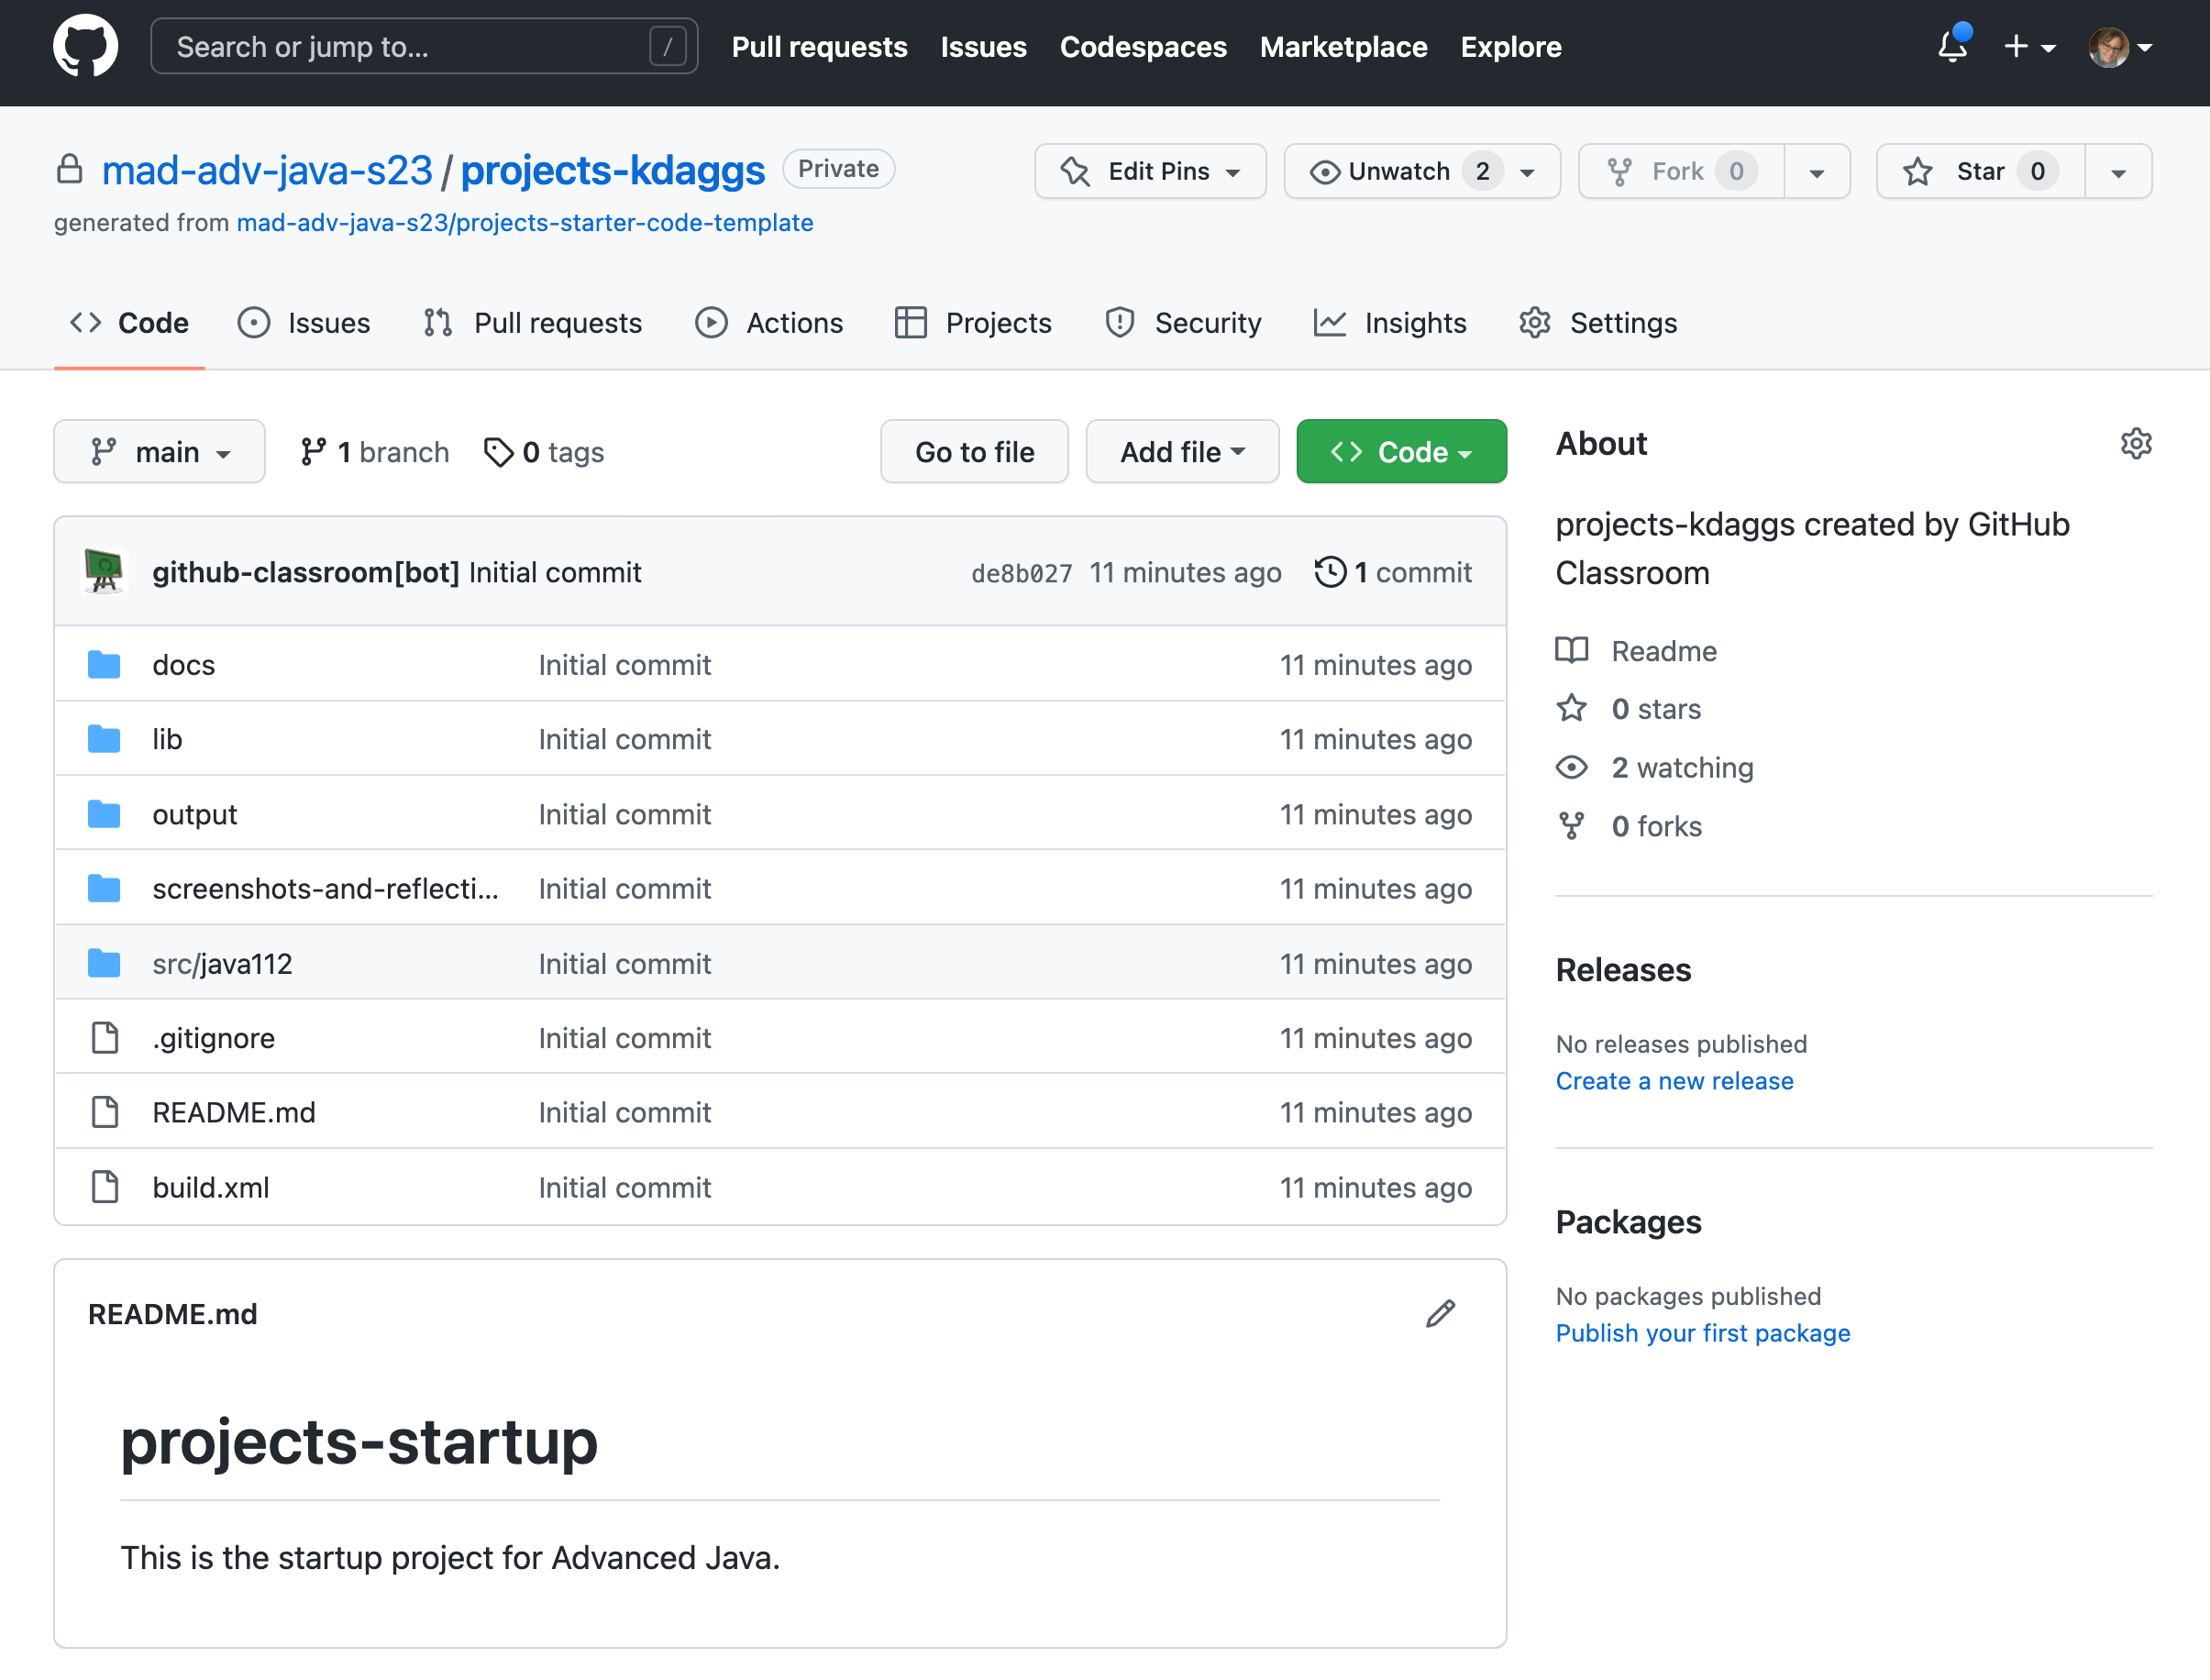
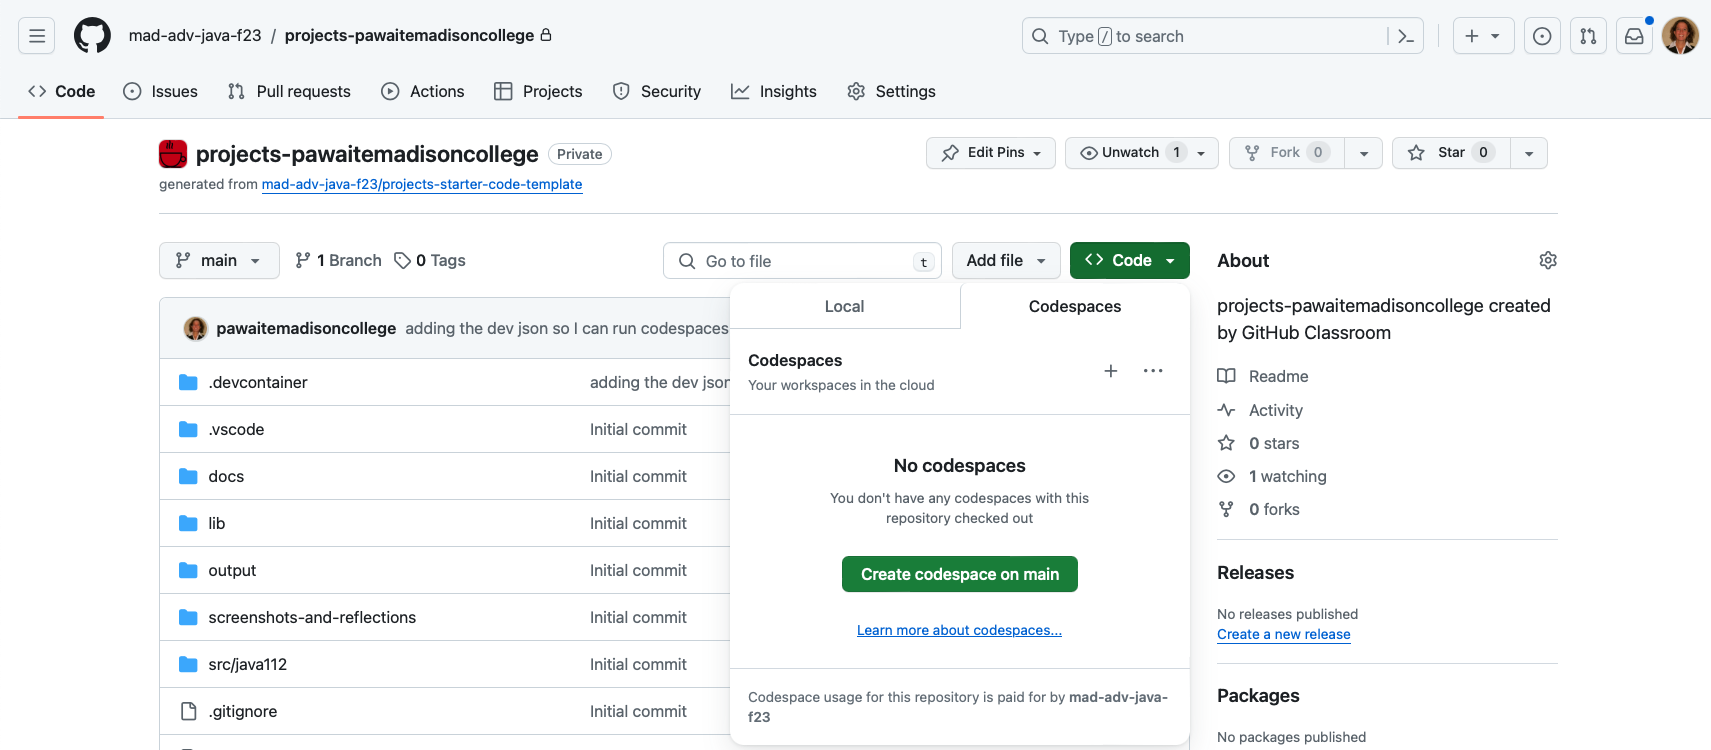
Click on the link you received above. You should see something like this:
-
Click on the "Code" button and then the Codespaces tab. Next, click on the "Create codespace on main" button.
-
GitHub will set up your codespace: a development environment hosted in the cloud that allows you to work using any device with a browser and internet access.
You just fished setting up your development environment!
You will be using this codespace all semester, so you won't need to repeat this process again.
Part 2
Starting Your Project!
-
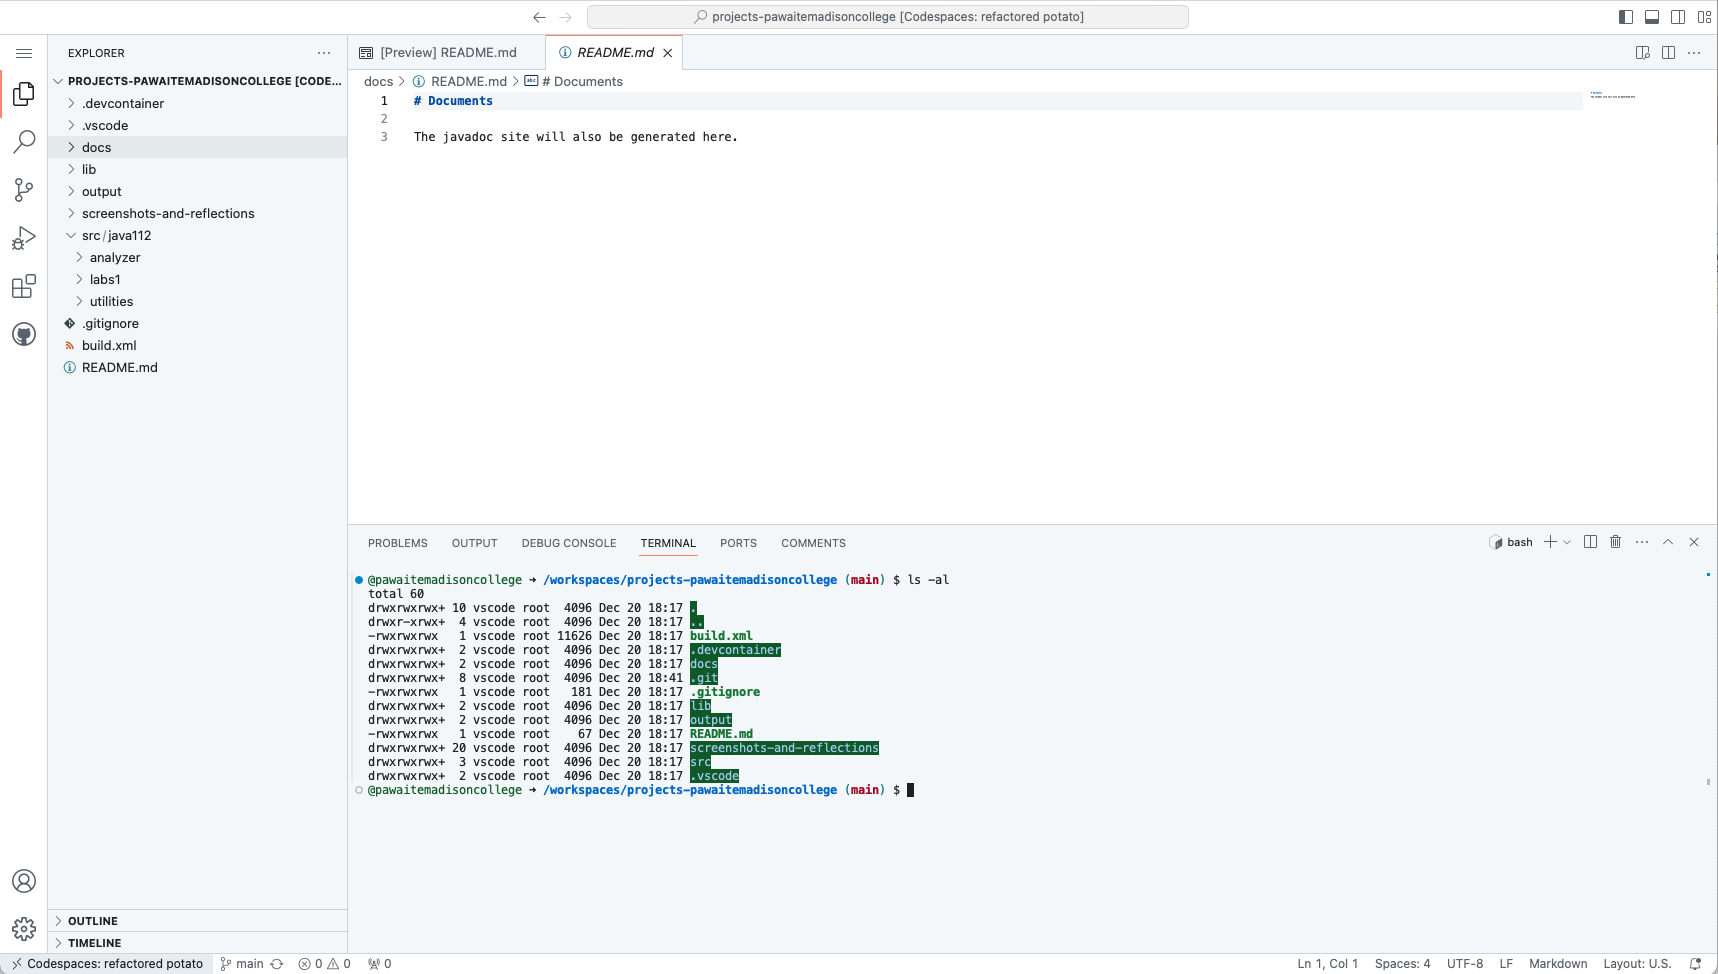
Let's take a look at what we have in our codespace. The environment should feel familiar if you've used Visual Studio Code. You can see and interact with the files in your project on the left hand side, and you also have a terminal to interact with the file system on the bottom. Let's practice with a few commands! See a list of commonly used Linux command here.
-
To view the content of your projects directory, enter this on the command line.
$ ls -l -
You should see output similar to this.
@kkschumacher ➜ /workspaces/projects-kkschumacher (main) $ ls -l total 40 -rwxrwxrwx 1 vscode root 11626 Jan 1 22:03 build.xml drwxrwxrwx+ 2 vscode root 4096 Jan 1 22:03 codespaces-config drwxrwxrwx+ 2 vscode root 4096 Jan 1 22:03 docs drwxrwxrwx+ 2 vscode root 4096 Jan 1 22:03 lib drwxrwxrwx+ 2 vscode root 4096 Jan 1 22:03 output -rwxrwxrwx 1 vscode root 291 Jan 1 22:03 README.md drwxrwxrwx+ 20 vscode root 4096 Jan 1 22:03 screenshots drwxrwxrwx+ 3 vscode root 4096 Jan 1 22:03 src -
Is that everything? Well, no. Let's look at everything with this command.
$ ls -al@kkschumacher ➜ /workspaces/projects-kkschumacher (main) $ ls -al total 60 drwxrwxrwx+ 10 vscode root 4096 Jan 1 22:03 . drwxr-xrwx+ 4 vscode root 4096 Jan 1 22:03 .. -rwxrwxrwx 1 vscode root 11626 Jan 1 22:03 build.xml drwxrwxrwx+ 2 vscode root 4096 Jan 1 22:03 codespaces-config drwxrwxrwx+ 2 vscode root 4096 Jan 1 22:03 .devcontainer drwxrwxrwx+ 2 vscode root 4096 Jan 1 22:03 docs drwxrwxrwx+ 8 vscode root 4096 Jan 1 22:04 .git -rwxrwxrwx 1 vscode root 181 Jan 1 22:03 .gitignore drwxrwxrwx+ 2 vscode root 4096 Jan 1 22:03 lib drwxrwxrwx+ 2 vscode root 4096 Jan 1 22:03 output -rwxrwxrwx 1 vscode root 291 Jan 1 22:03 README.md drwxrwxrwx+ 20 vscode root 4096 Jan 1 22:03 screenshots drwxrwxrwx+ 3 vscode root 4096 Jan 1 22:03 srcThe
.gitdirectory is really important, that's your real repository. Don't ever mess with it.The
.gitignorefile is a list of things we want git to ignore. -
What's in that
.gitignorefile? Enter this to see it.$ cat .gitignoreThese files, file patterns, and directories will be ignored by
git. -
What if we want to see what's inside of a directory, like src? We can use the command
cdto change to a directory, like this:cd src@kkschumacher ➜ /workspaces/projects-kkschumacher (main) $ cd src@kkschumacher ➜ /workspaces/projects-kkschumacher/src (main) $ -
Then we can use the
ls -lcommand to view what's in that directory.@kkschumacher ➜ /workspaces/projects-kkschumacher/src (main) $ ls -l total 4 drwxrwxrwx+ 5 vscode root 4096 Jan 1 22:03 java112 -
Use the commands you just learned to look inside the java112 directory. When you are done poking around, you can return to your projects directory by using
cd ../to move back up one directory.cd ../../would move back up two directories. -
The
pwdcommand, or "print working directory" is handy to see where you are at any point in time.@kkschumacher ➜ /workspaces/projects-kkschumacher (main) $ pwd/workspaces/projects-kkschumacher -
Using the command line to navigate back to your projects directory. Then enter
git statuson the command line.@kkschumacher ➜ /workspaces/projects-kkschumacher (main) $ git status On branch main Your branch is up to date with 'origin/main'. nothing to commit, working tree cleanThere are a lot of new terms and concepts there. We'll start slowly and try not to get overwhelmed. We'll spend lots of time over the coming weeks learning more about git.
Part 3
Scripts
-
There are some scripts that you will use to run lab, demo, and project code. Learn about and download the scripts here.
- Download the scripts in the above link. Then, drag and drop them to your projects directory in codespaces -- make sure to do this in your codespace environment, not GitHub!
-
In your terminal, copy this script and run it in the terminal. This will allow you to use the
tabkey to find ant targets (more on that soon)!source codespaces-config/ant-completion.bash
Exit Codespaces
To exit codespaces, simply close your browser.
Screenshot
To receive credit for this lab, please use a Slack DM (direct message) to send your instructor a screenshot showing your projects directory in your codespaces environment using the command line. Your screenshot should look something like the one below.
To take a screenshot, press the PrtSc key on a Windows keyboard, or Command + Shift + 3 on a Mac.
Rubric
All of the following must be satisfied to achieve a "Met" status
- Screenshot clearly shows file structure.
- Script files have been added to projects directory and have execute permissions.